Adding a Ribbon Hanger to a Felted Ornament
Last post, I demonstrated how to attach a ribbon hanger to felted ornaments using my “tab” method. This tutorial is a follow-up and offers an alternate way to attach ribbon hangers to felted ornaments using my “hidden” method. I prefer this method myself; there are no extra felted shapes to attach and the knot holding the ribbon hanger in place remains hidden and out of the way. Therefore, allowing only the ornament, itself, to be on display!
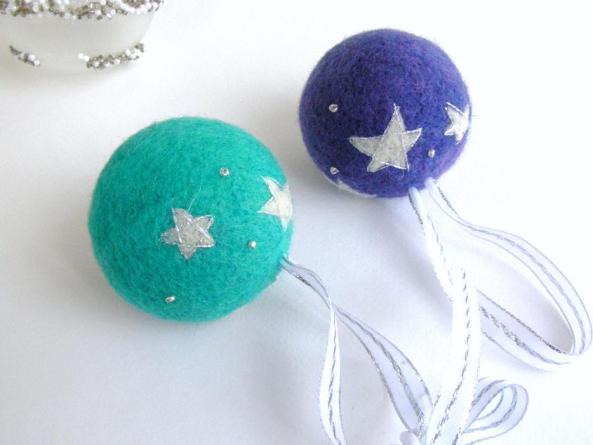
The blue ornament below has a small, cute bow on top. And the purple ornament has a simple loop. Both of these looks are achieved using my “hidden” method with very slight alterations between the two.
For both looks, the first step involves hollowing out a small hole on the underside of a felted ball. This is achieved with a small pair of scissors.
First, I will demonstrate how to achieve the “simple loop” look and last I will demonstrate the “cute bow” look.
The “Simple Loop” Ribbon Hanger
Thread a decorative ribbon on a large yarn needle. Push the yarn needle into your felted ball through the hole in the bottom. Then, pull the yarn needle through the top, center of the felted ball. If the ribbon offers resistance, grab a pair of pliers for some extra force. Now the felted ball should have the ribbon going straight through it.
Next, push the yarn needle through the top of the ball and pull it out through the bottom. Both ends should be on the underside of the felted ball and a loop should be on the top. Tie a knot with the ends of the ribbon.
Almost Done! Simply trim the ends of the knot, and pull the knot firmly inside the hole. Now the simple loop hanger is complete. The only thing left to do is use some imagination and decorate the ornament! Use care while felting over the “hidden” knot; you do not want to carelessly break your fragile felting needle.
The “Cute Bow” Ribbon Hanger
Thread a decorative ribbon on a large yarn needle. Push the yarn needle into your felted ball through the top, center of the felted ball. Pull the yarn needle out through the hole in the bottom. If the ribbon offers resistance, use the pliers once again! Then push the yarn needle up through the bottom hole and pull the yarn needle out of the top, center of the ball.
Now the ribbon loop is on the bottom, and the two ribbon ends are on the top. Pull both ends, so that the loop becomes embedded in the bottom hole. Make sure that the ribbon ends are even, then tie a cute bow leaving enough space between the ball and the bow to create a “hanger”. The final step is decorating your ornament. Once again, be careful while felting over the “hidden” loop!
Now it’s time to get busy creating your felt ornaments. Happy Felting!


Комментариев нет:
Отправить комментарий