пятница, 8 января 2016 г.

Felted Cat Toy Tutorial

                                      Felted Cat Toy Tutorial

I had several people who had questions about the cat toys that I make that are felted. So here’s a little tutorial that shows how I make my cat toys. I apologize for the quality of the photos as I did this fairly quickly and didn’t have the proper lighting or any assistance. But you’ll get the idea :)
Supplies Needed
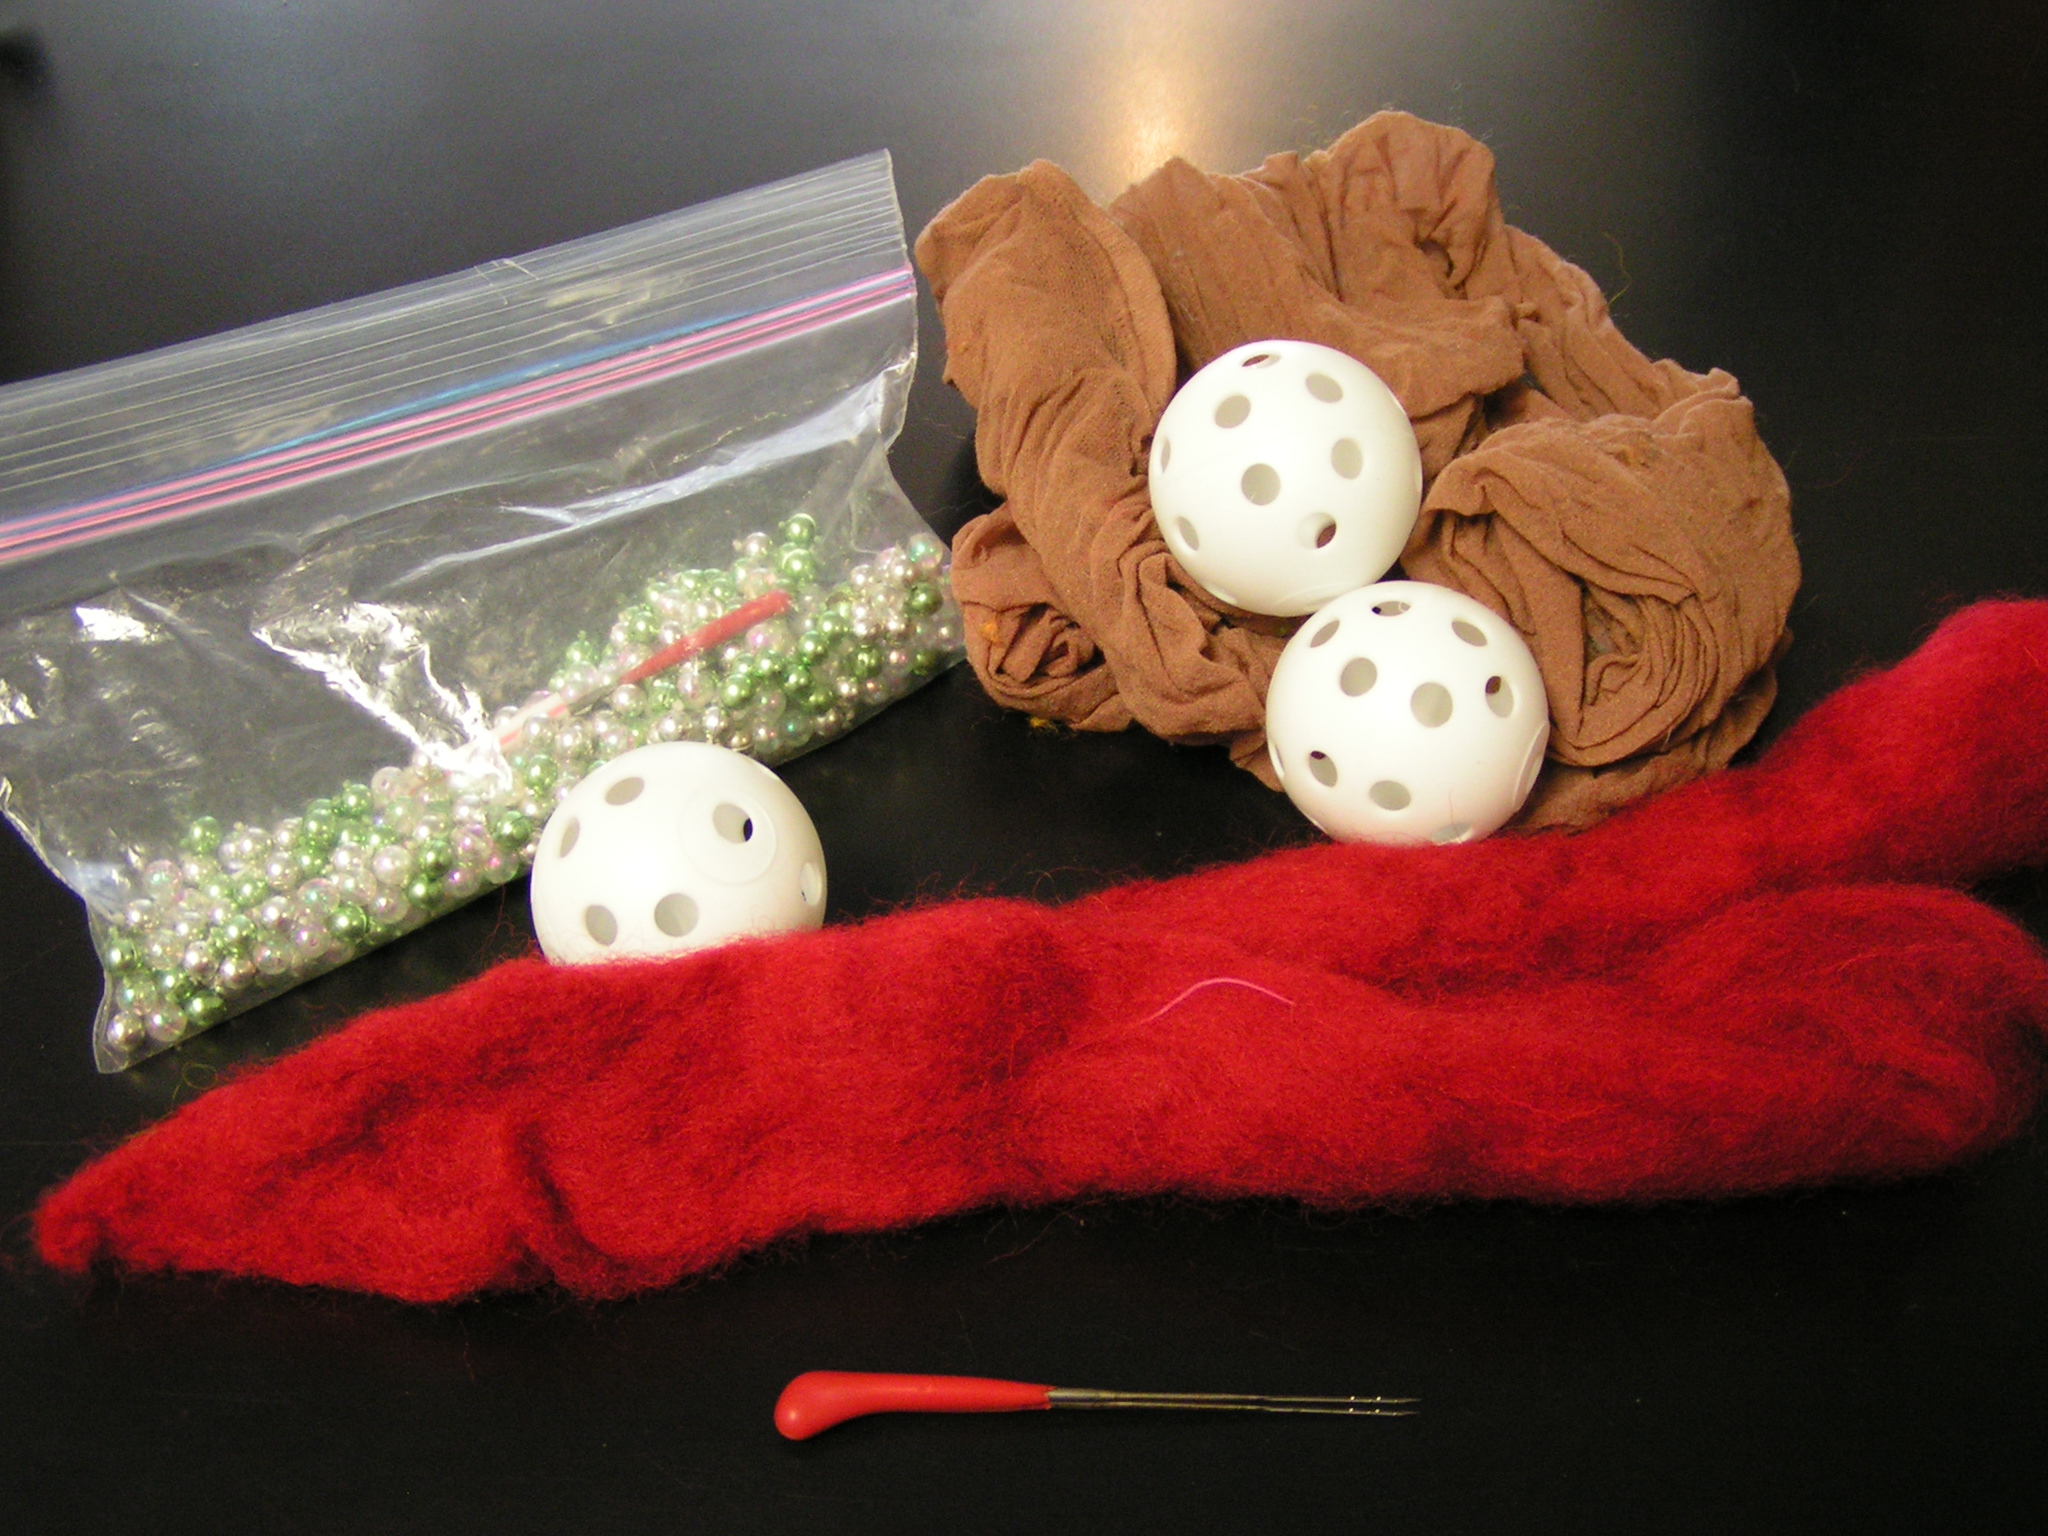
Supplies Needed: Practice golf balls, old pantyhose, wool roving, plastic beads (sized to fit through holes in golf balls), felting needle and a washing machine.
practice golf balls
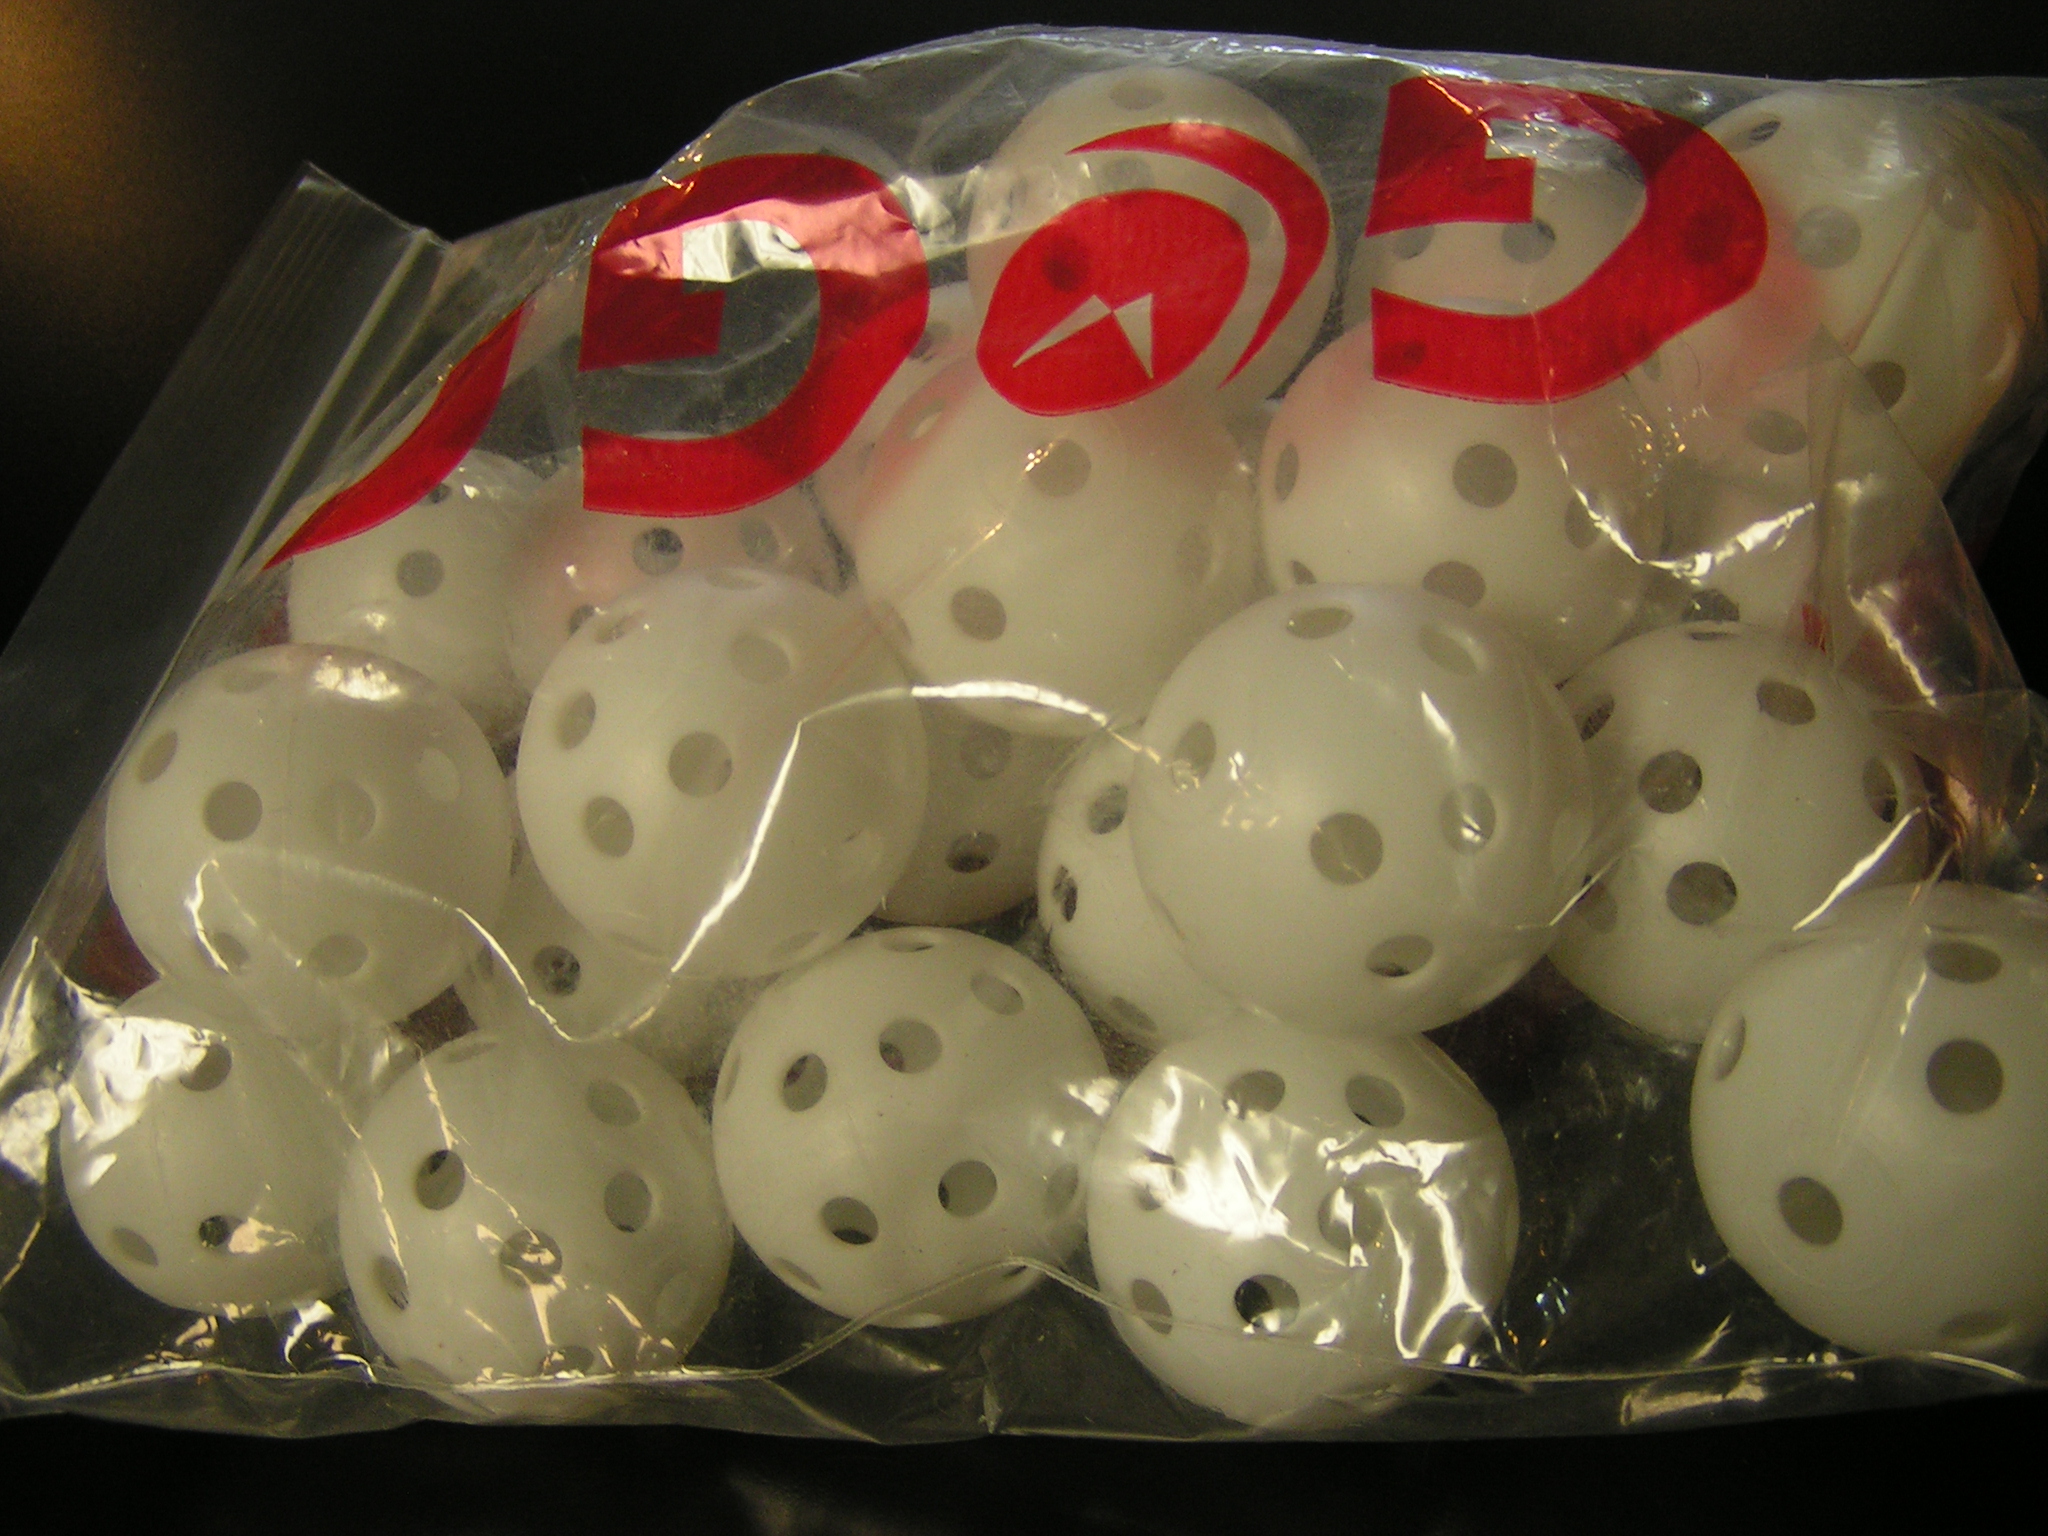
I buy the golf balls in bags of 24. You can usually find them in small amounts in stores that sell golfing supplies.
old pantyhose
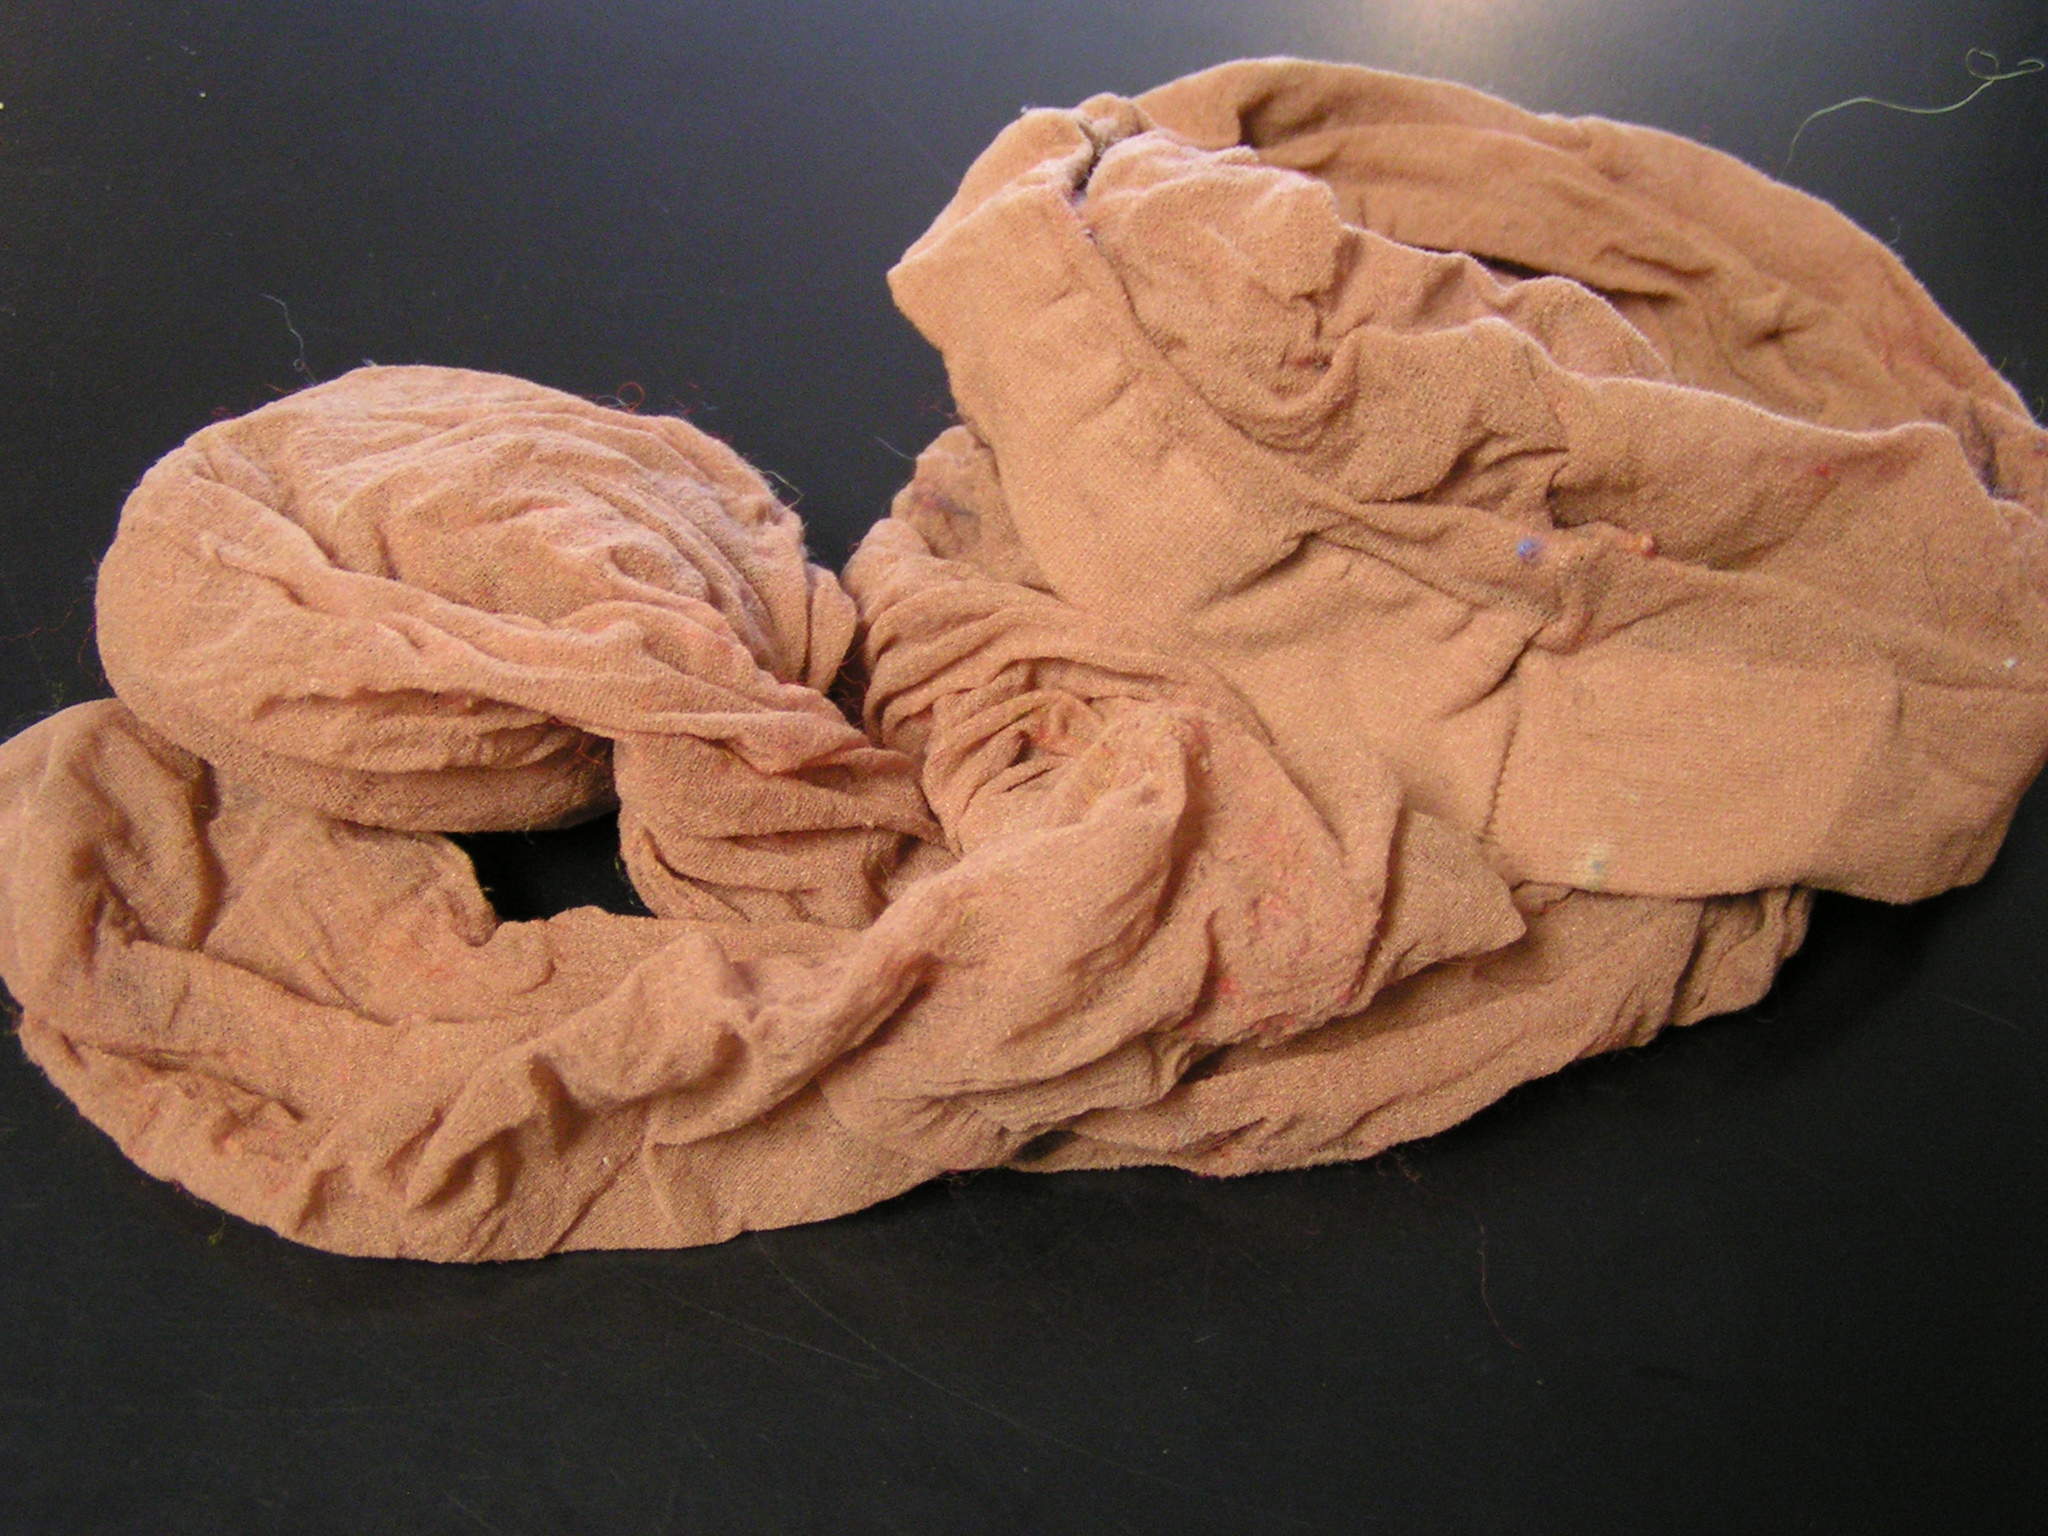
I buy the cheapest pantyhose I can find and re-use them until they are falling apart.
beads
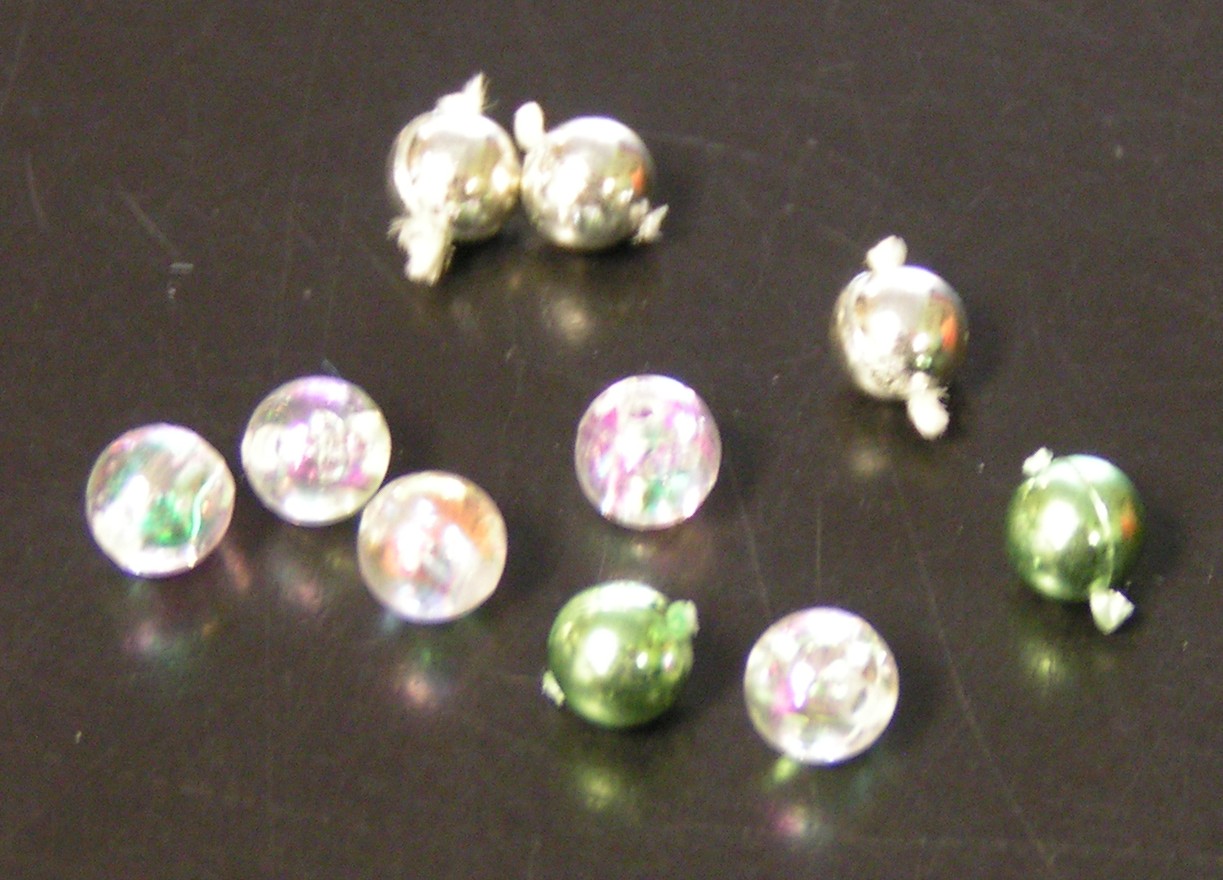
The beads are also the cheapest I can find – they are plastic and most come in strands that I just cut apart.
Amount of Wool Needed Per Ball
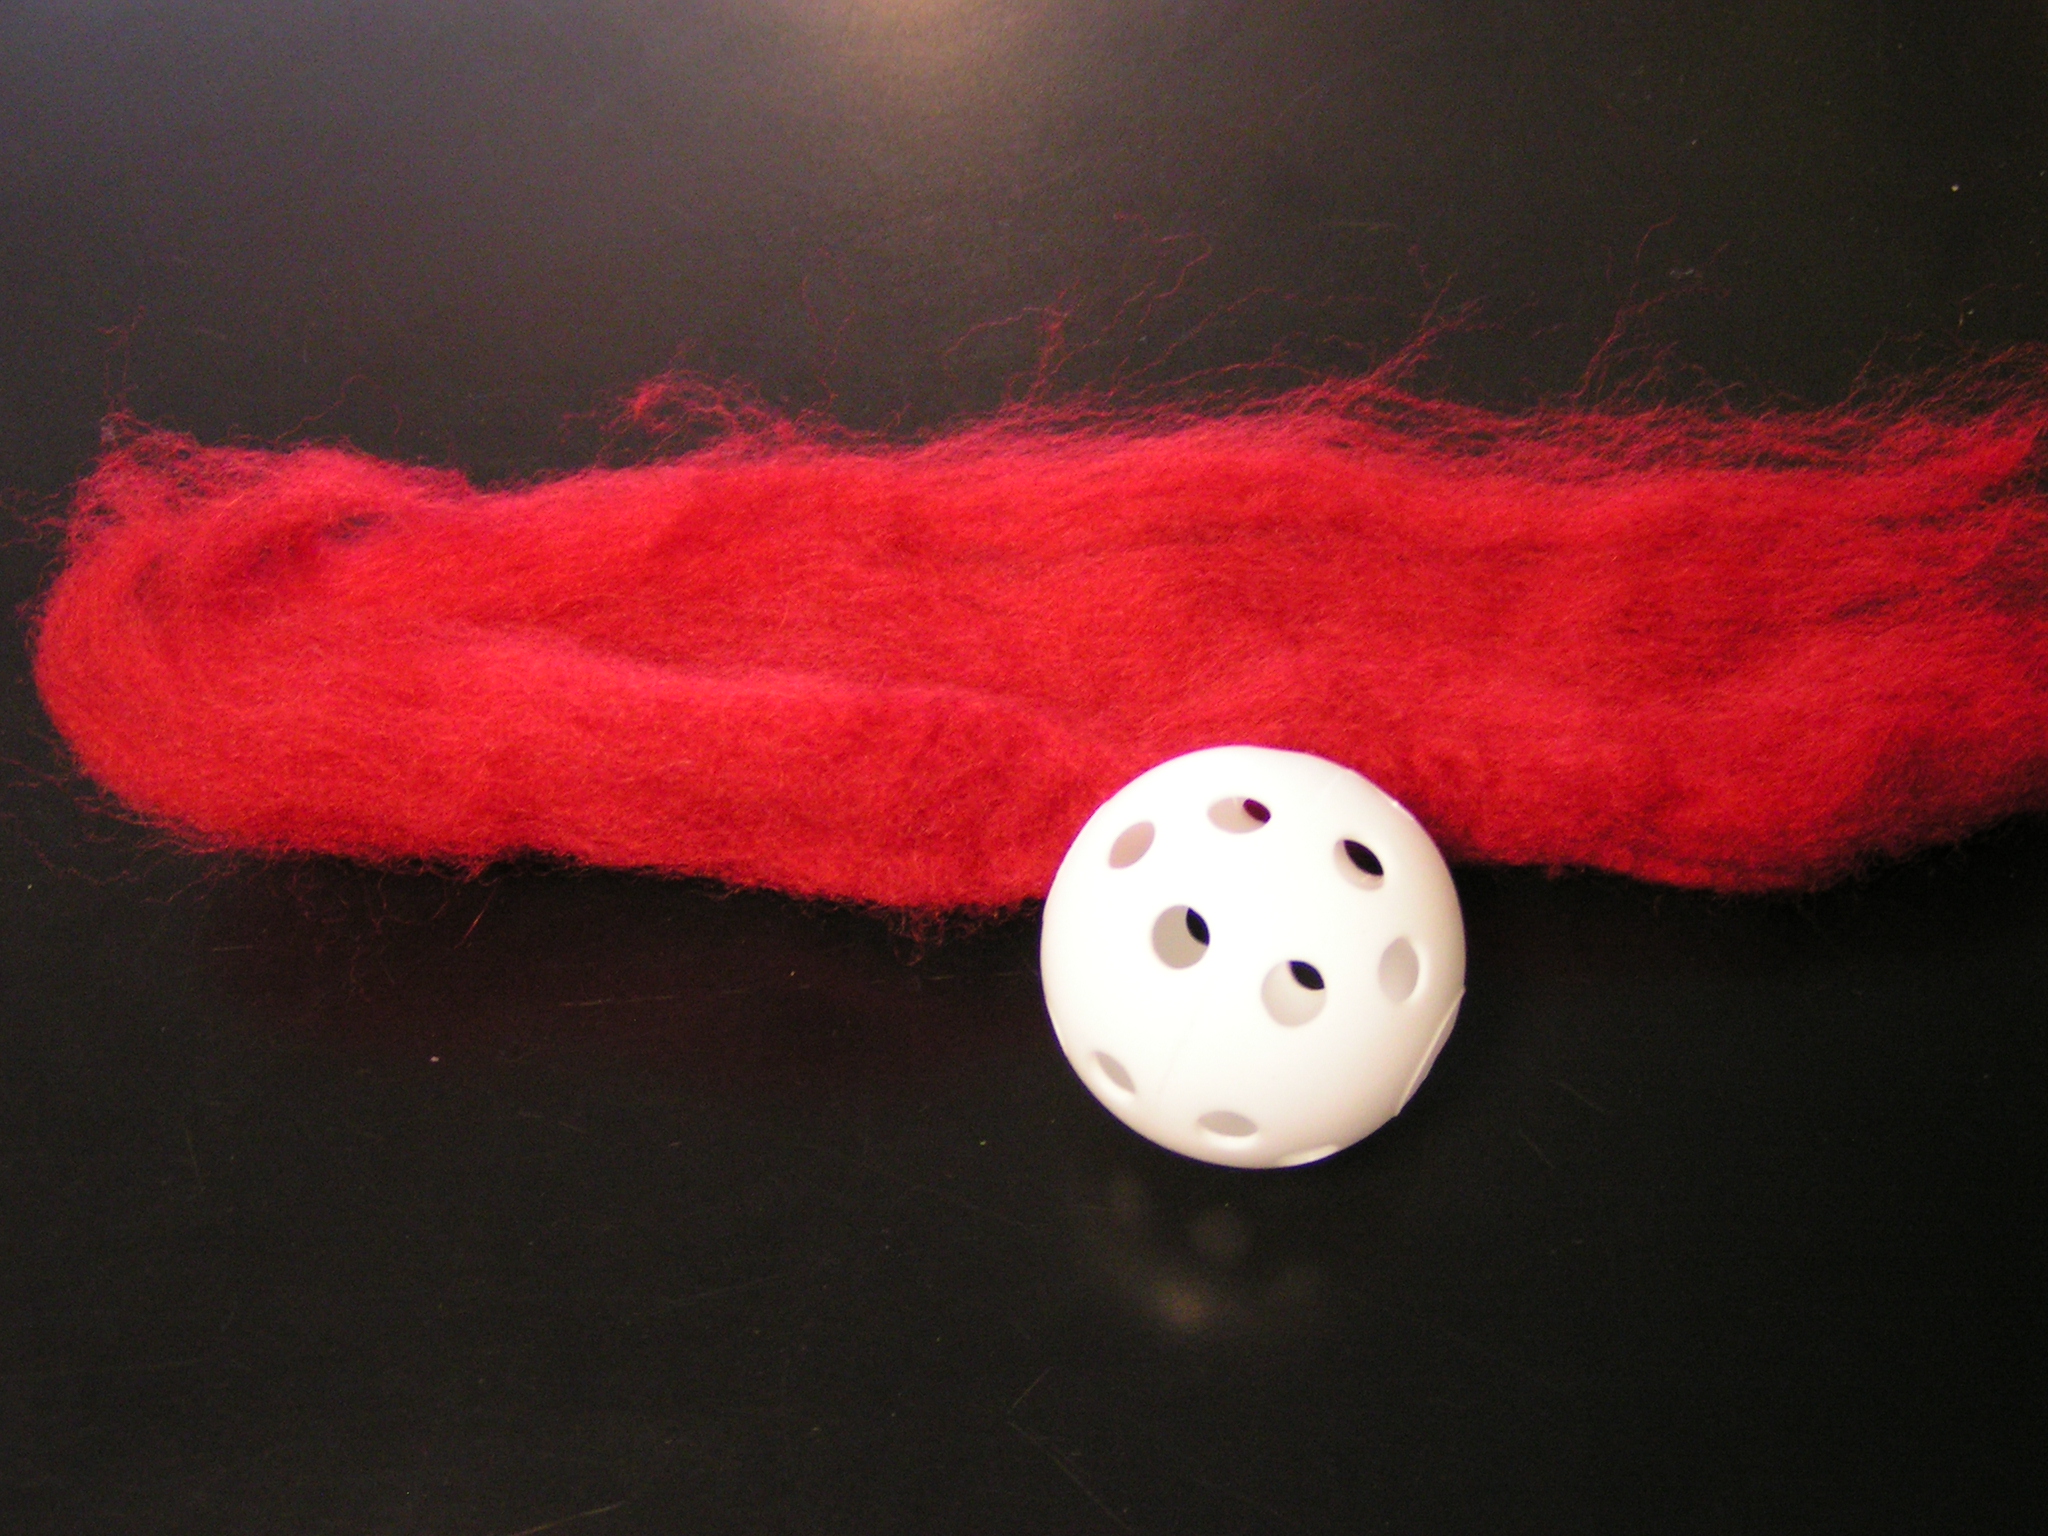
Begin with a piece of wool roving and the plastic golf ball and wrap the wool around the golf ball. In the photo above, I have pictured the amount of wool that I generally use to cover the ball.
Wrap Ball
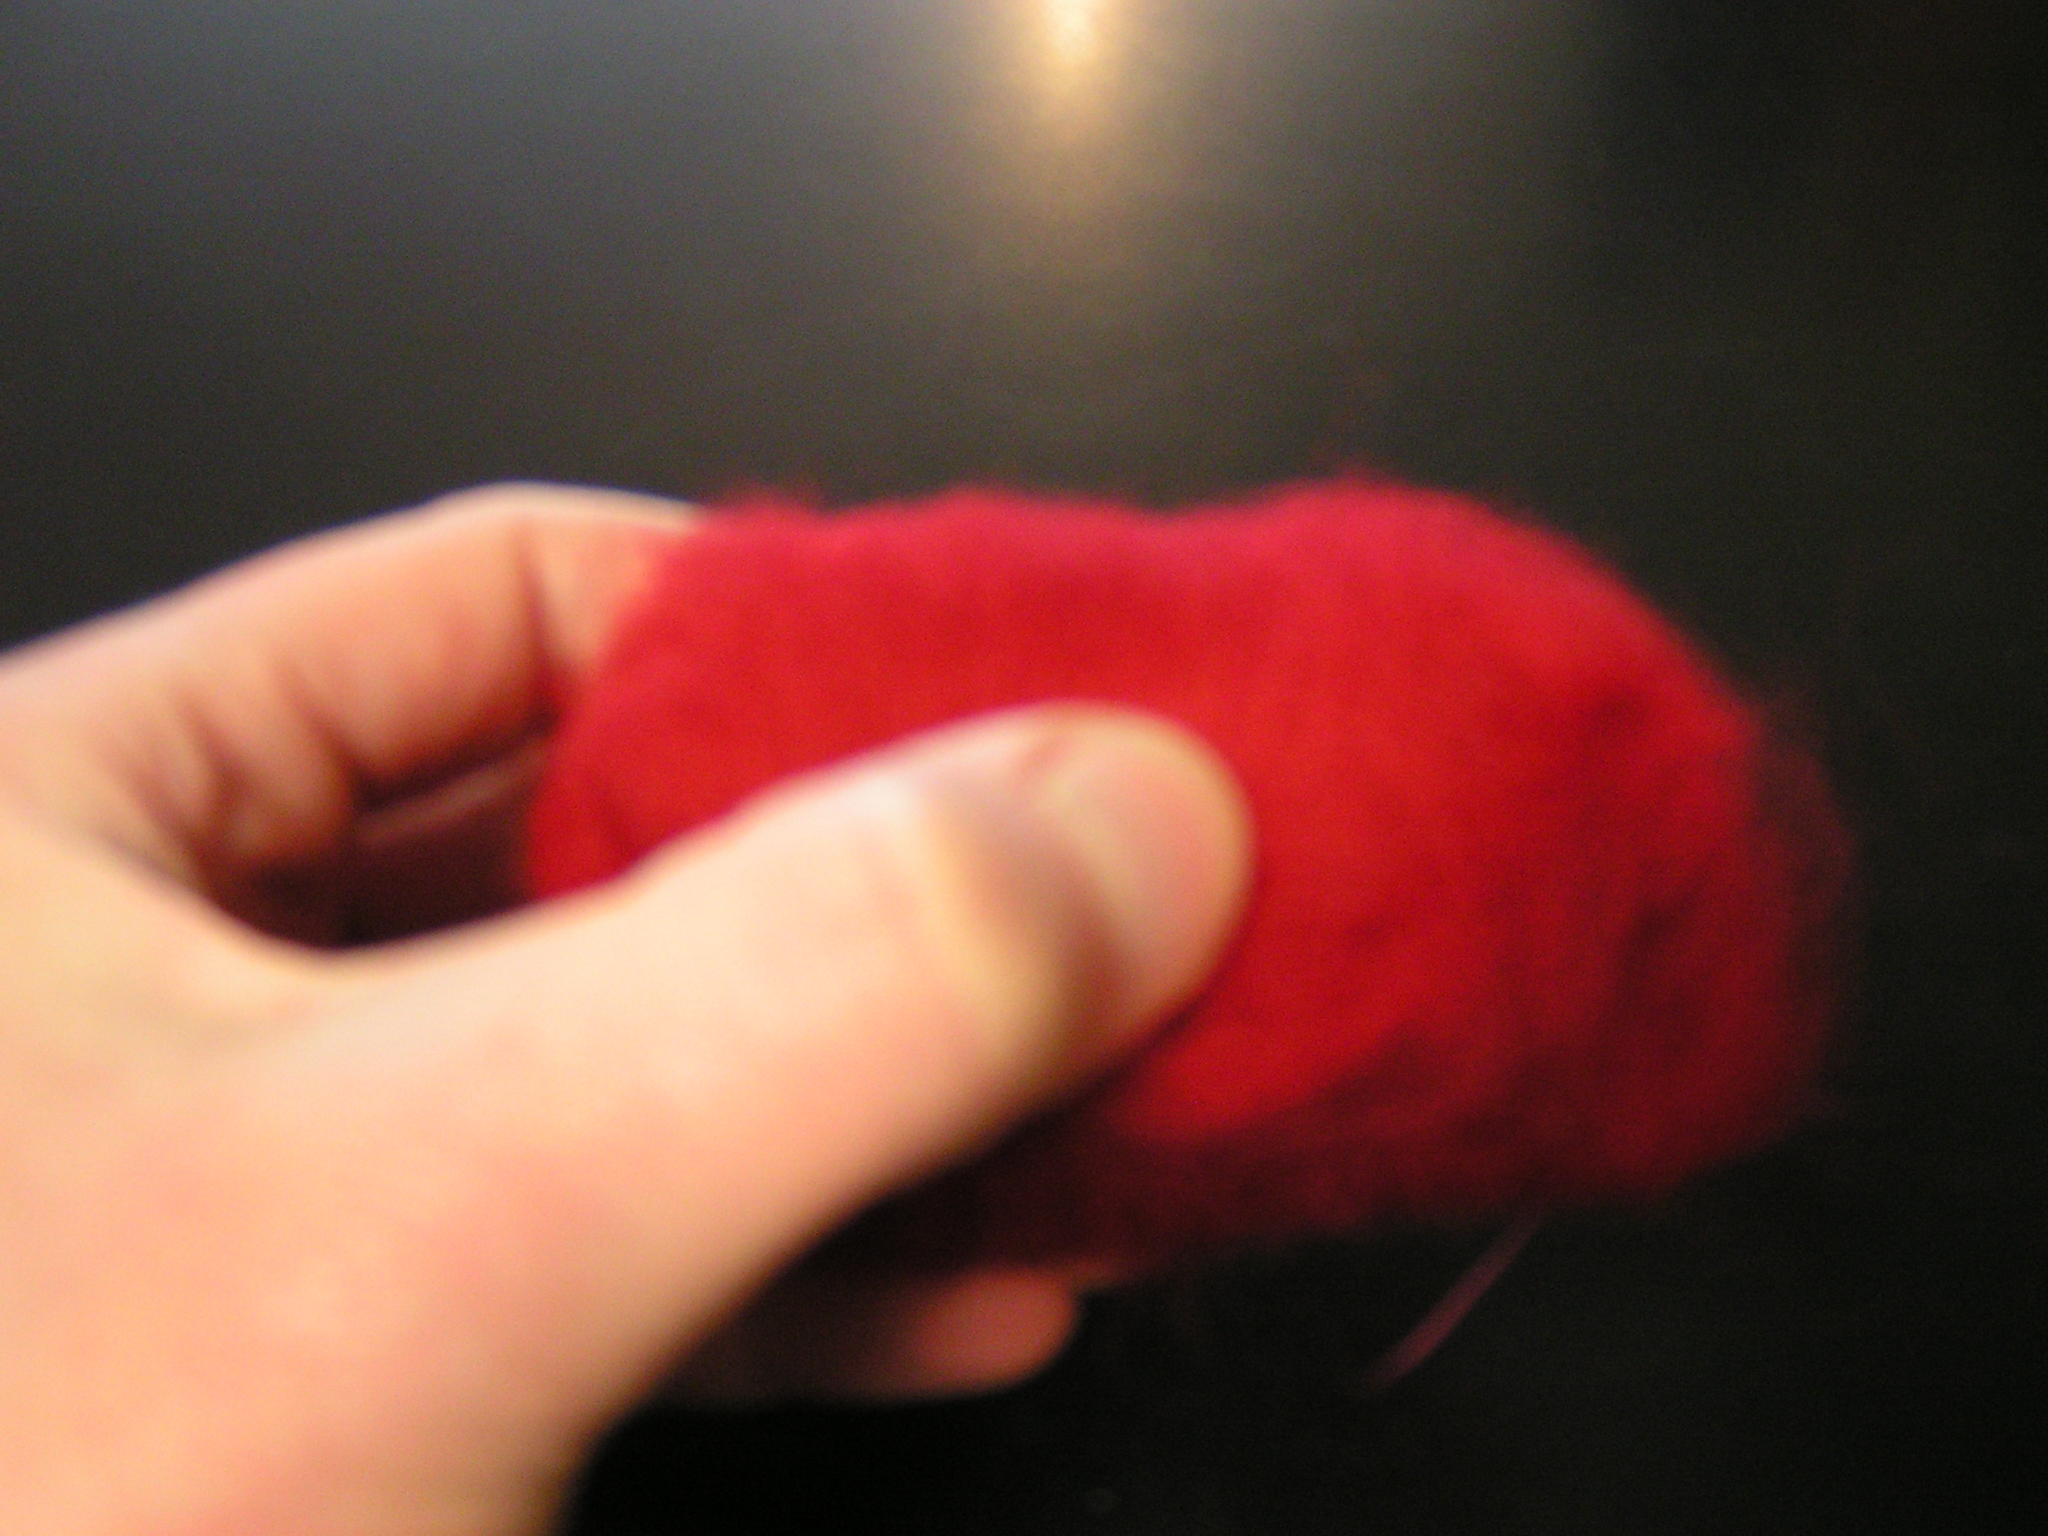
Wrap the wool around the ball holding it tightly so the wool is snug against the ball.
Ball Inside Wool
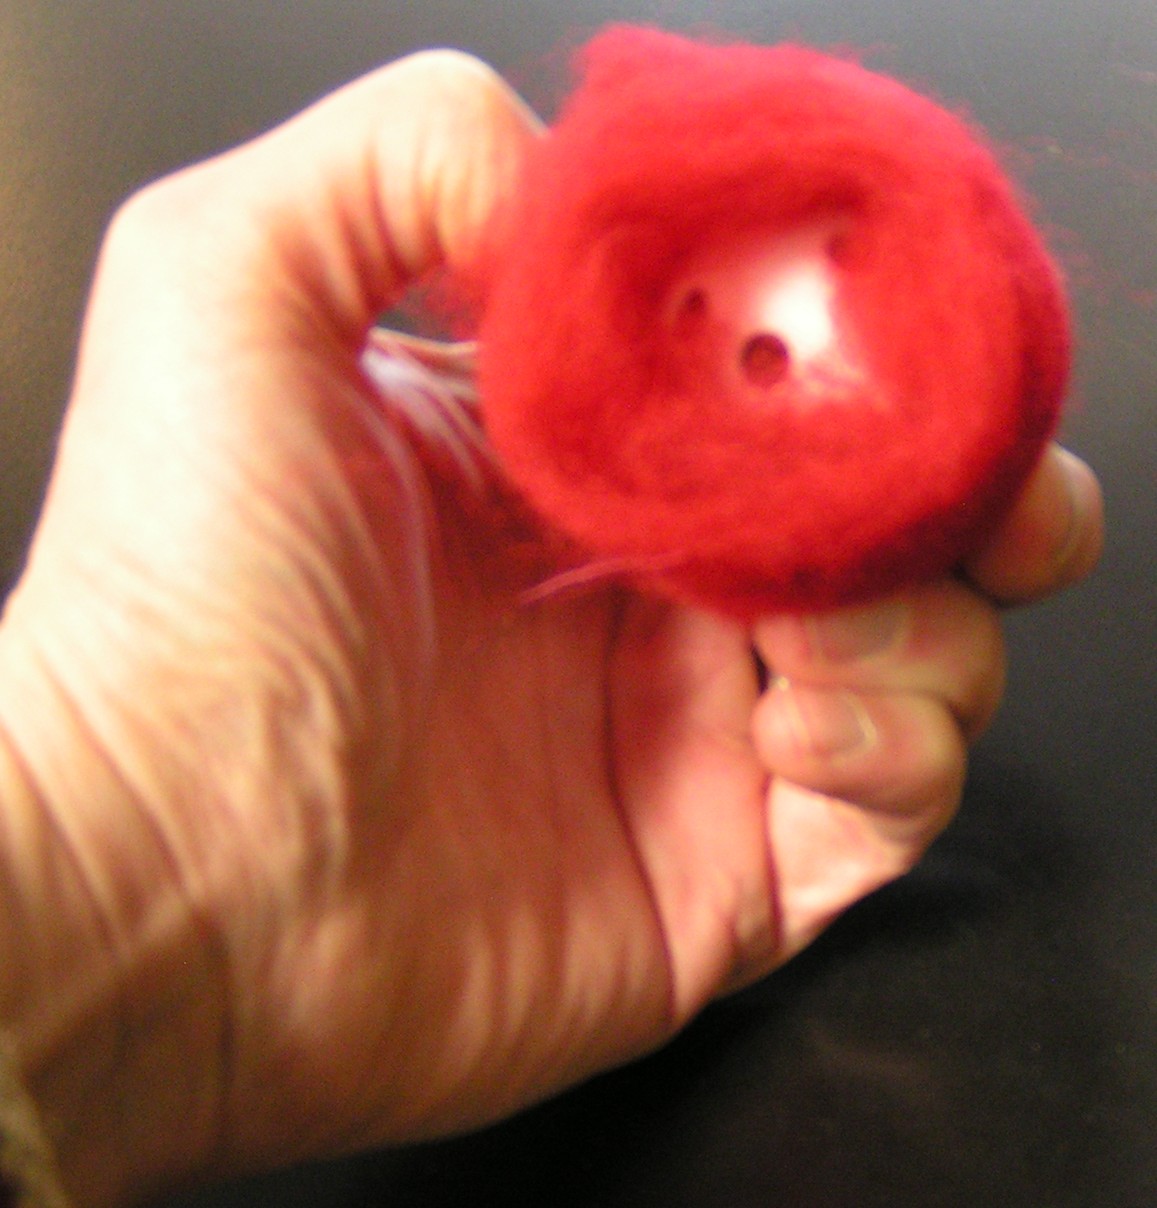
The ends will look like this after the first wrap.
Needle Wool Lightly
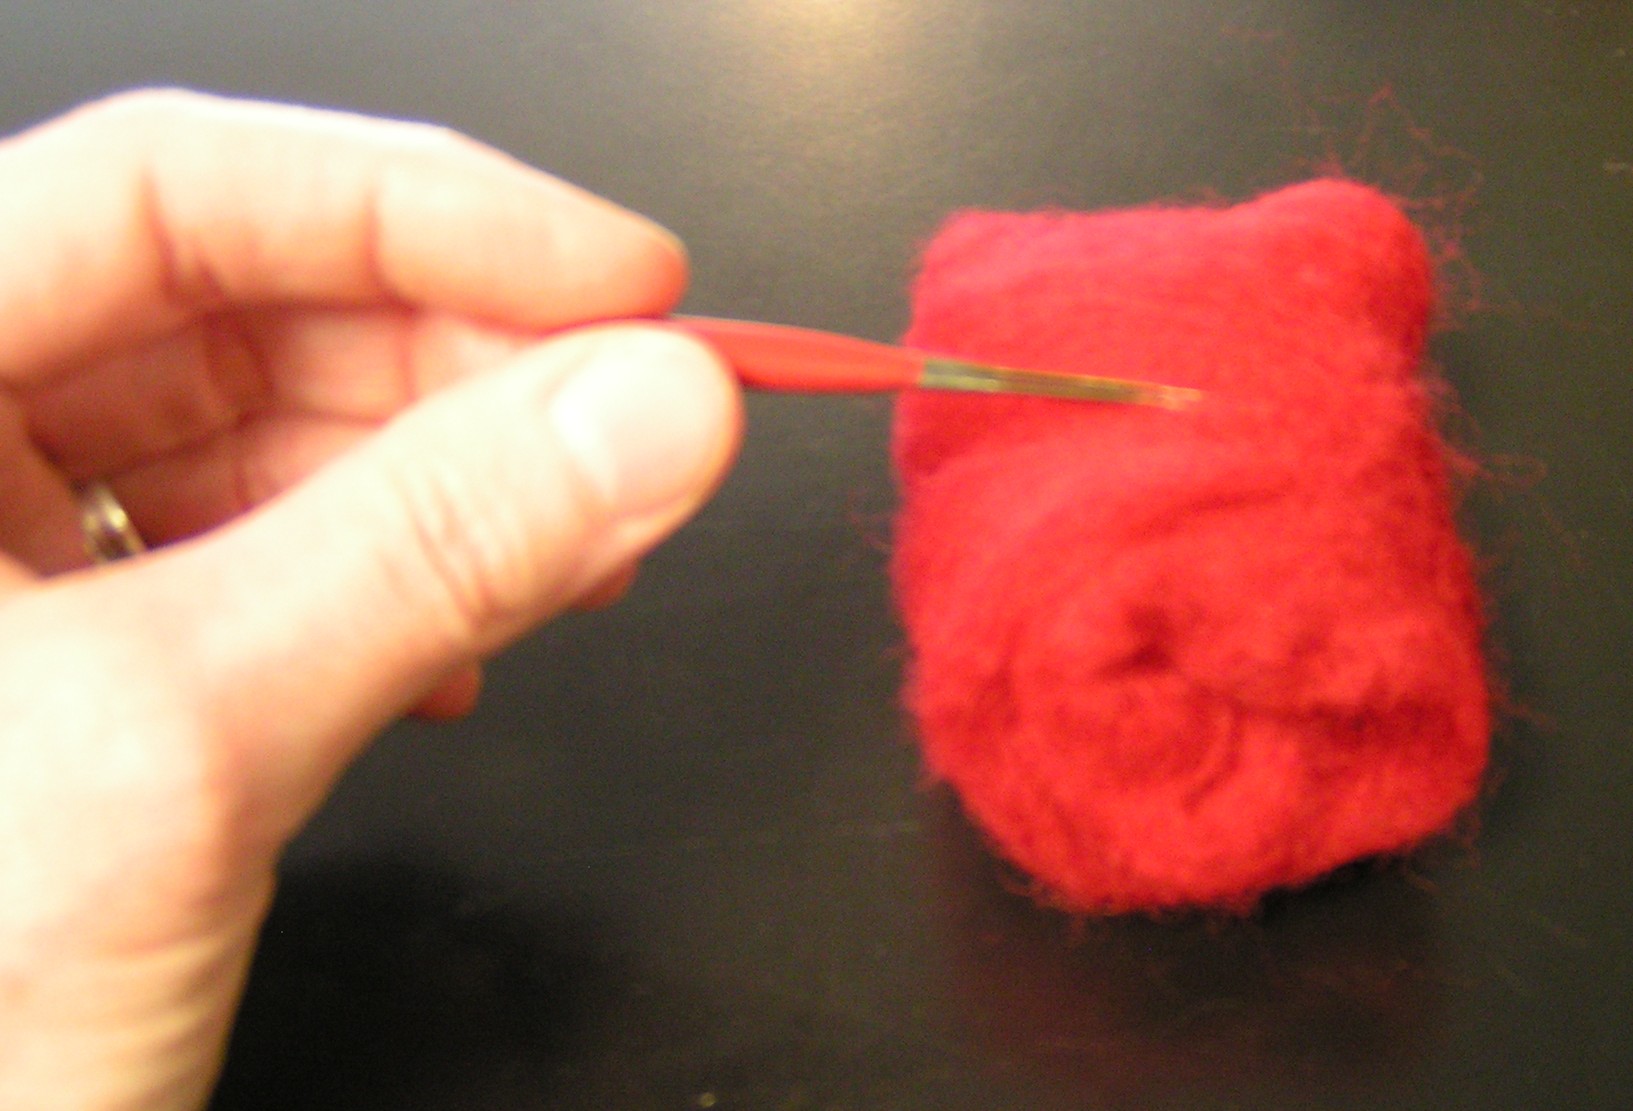
Use a felting needle to needle the ends into the wrapped wool just so it will hold together.
Needle Ends Closed
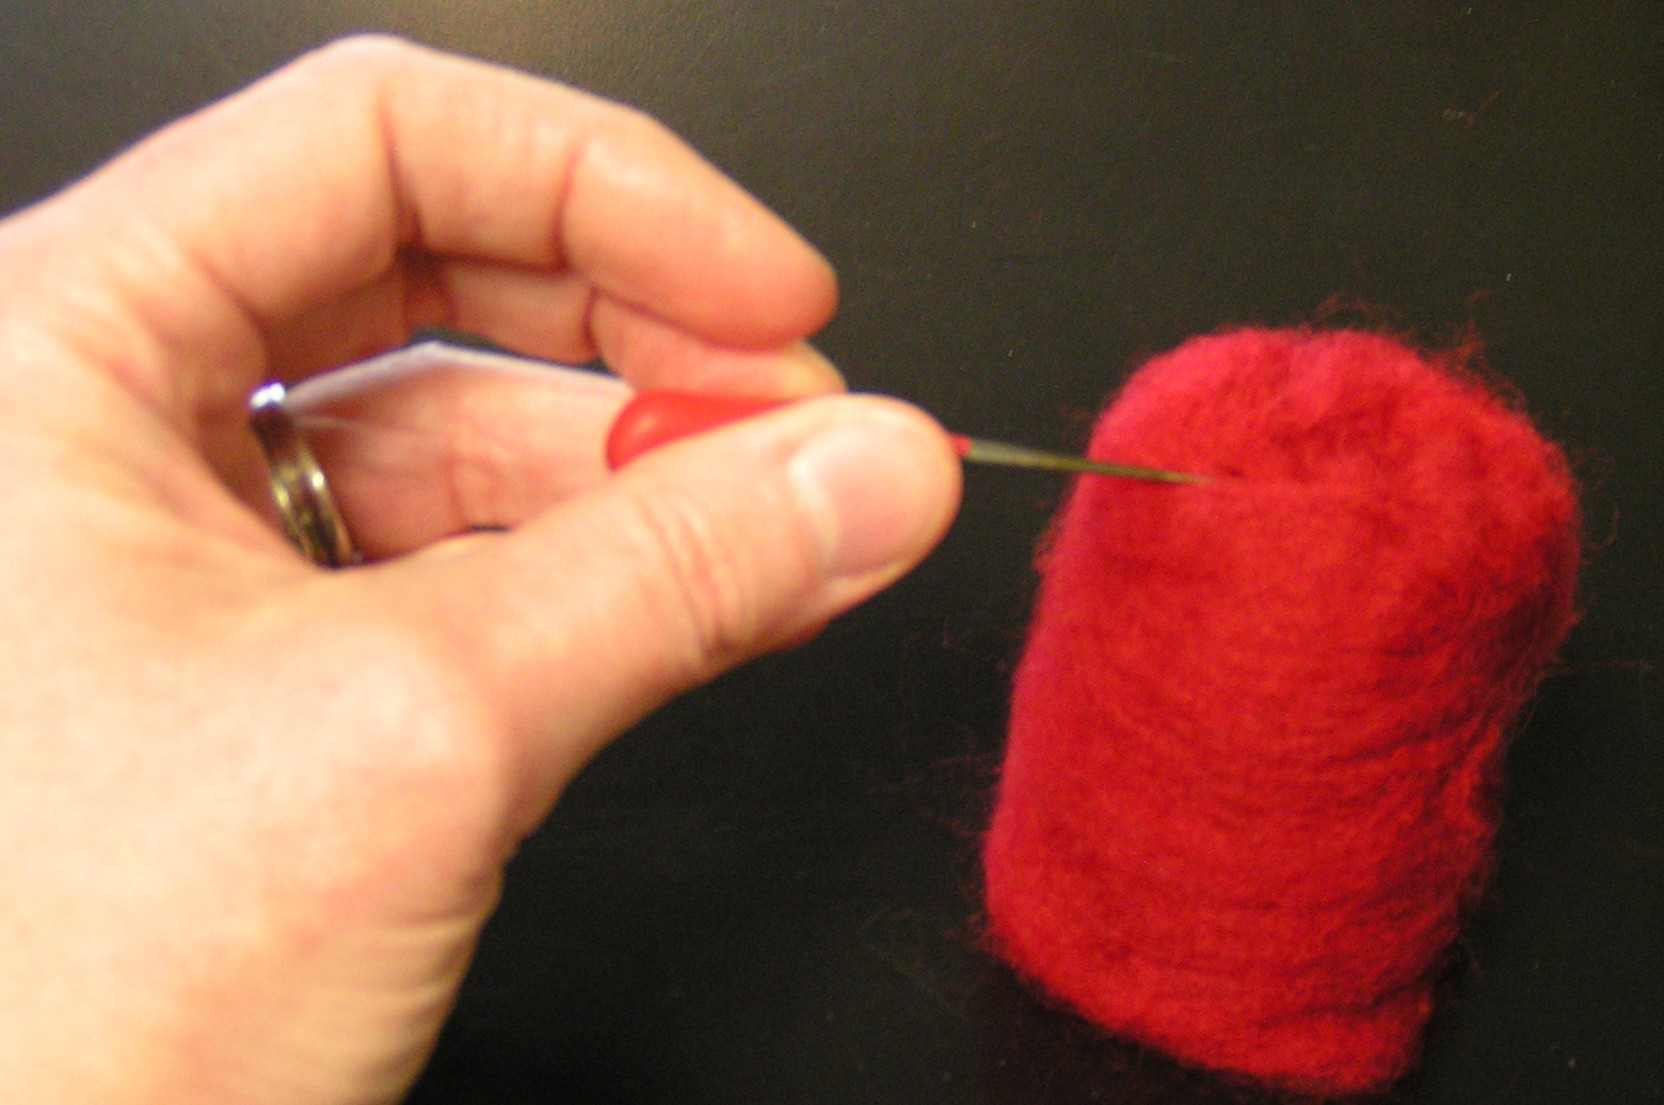
Then push the wool over the ‘end’ of the ball and needle it down until it holds together without any holes.
Insert Bead
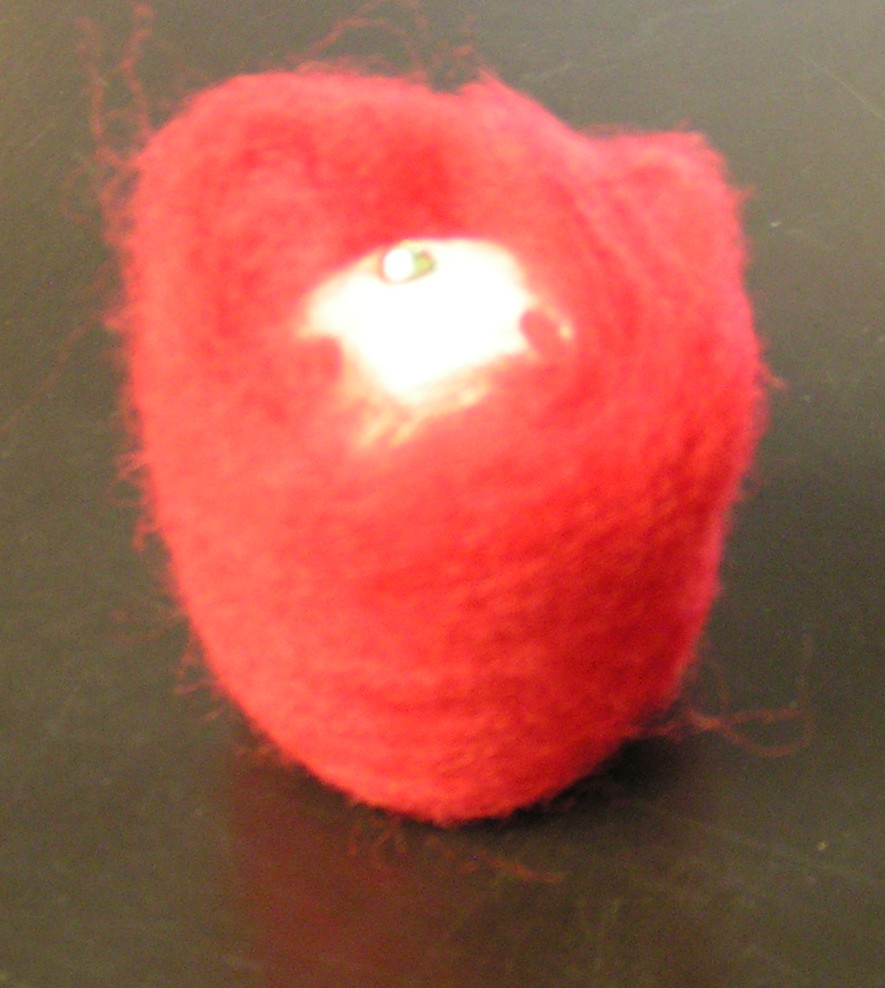
Put a bead through one of the holes and then needle that “end” of wool over the ball. Generally I needle for about 1-2 minutes at the most. All you want is for the wool to hold together over the ball at this point.
Ready to Tie Up
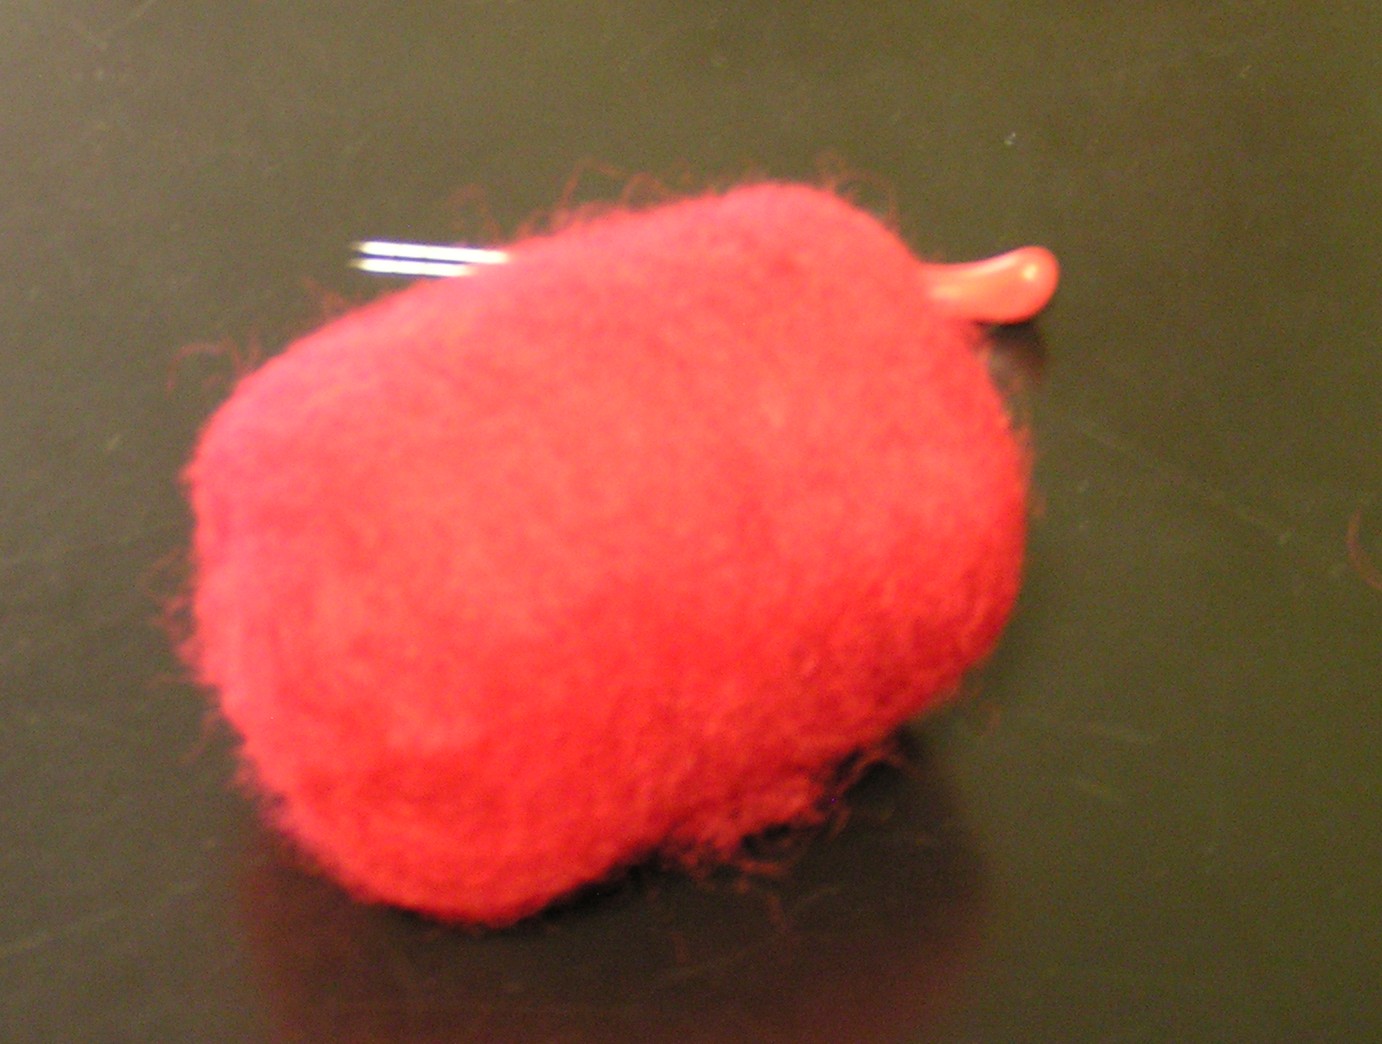
This is what the ball looks like after I have finished needling. As you can see it isn’t round but that gets taken care of in the wet felting process.
Put Into Pantyhose
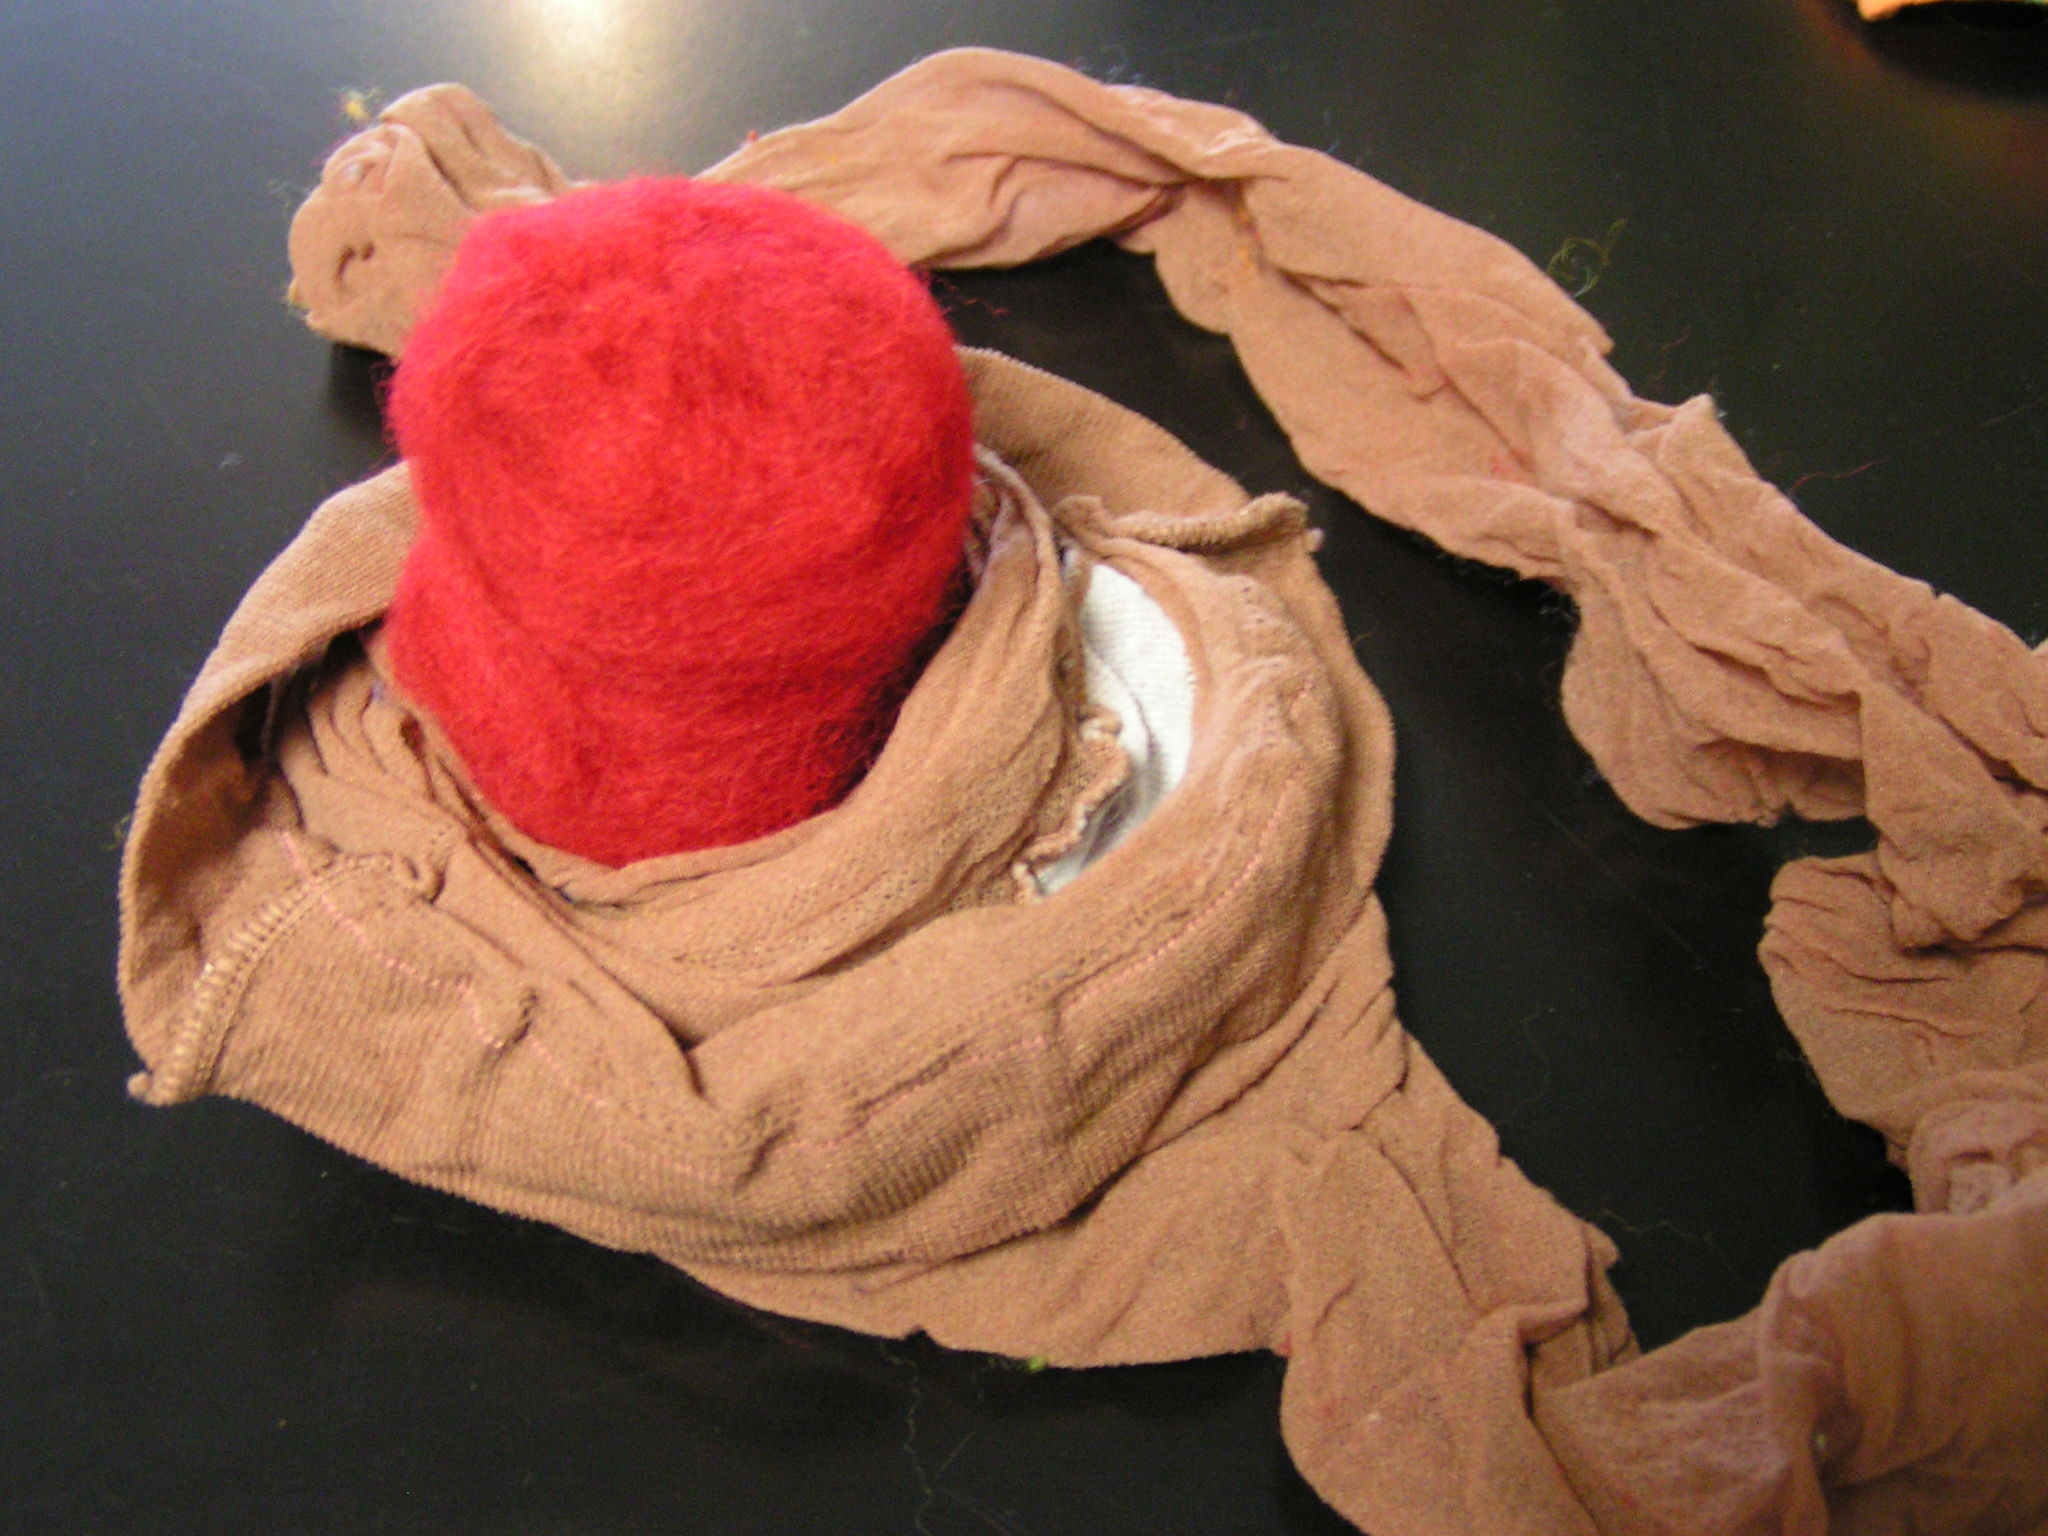
The next step is to put the ball into the end of the pantyhose leg. I couldn’t get a photo of myself doing this as I don’t seem to have enough hands.
Tie Up in Hose
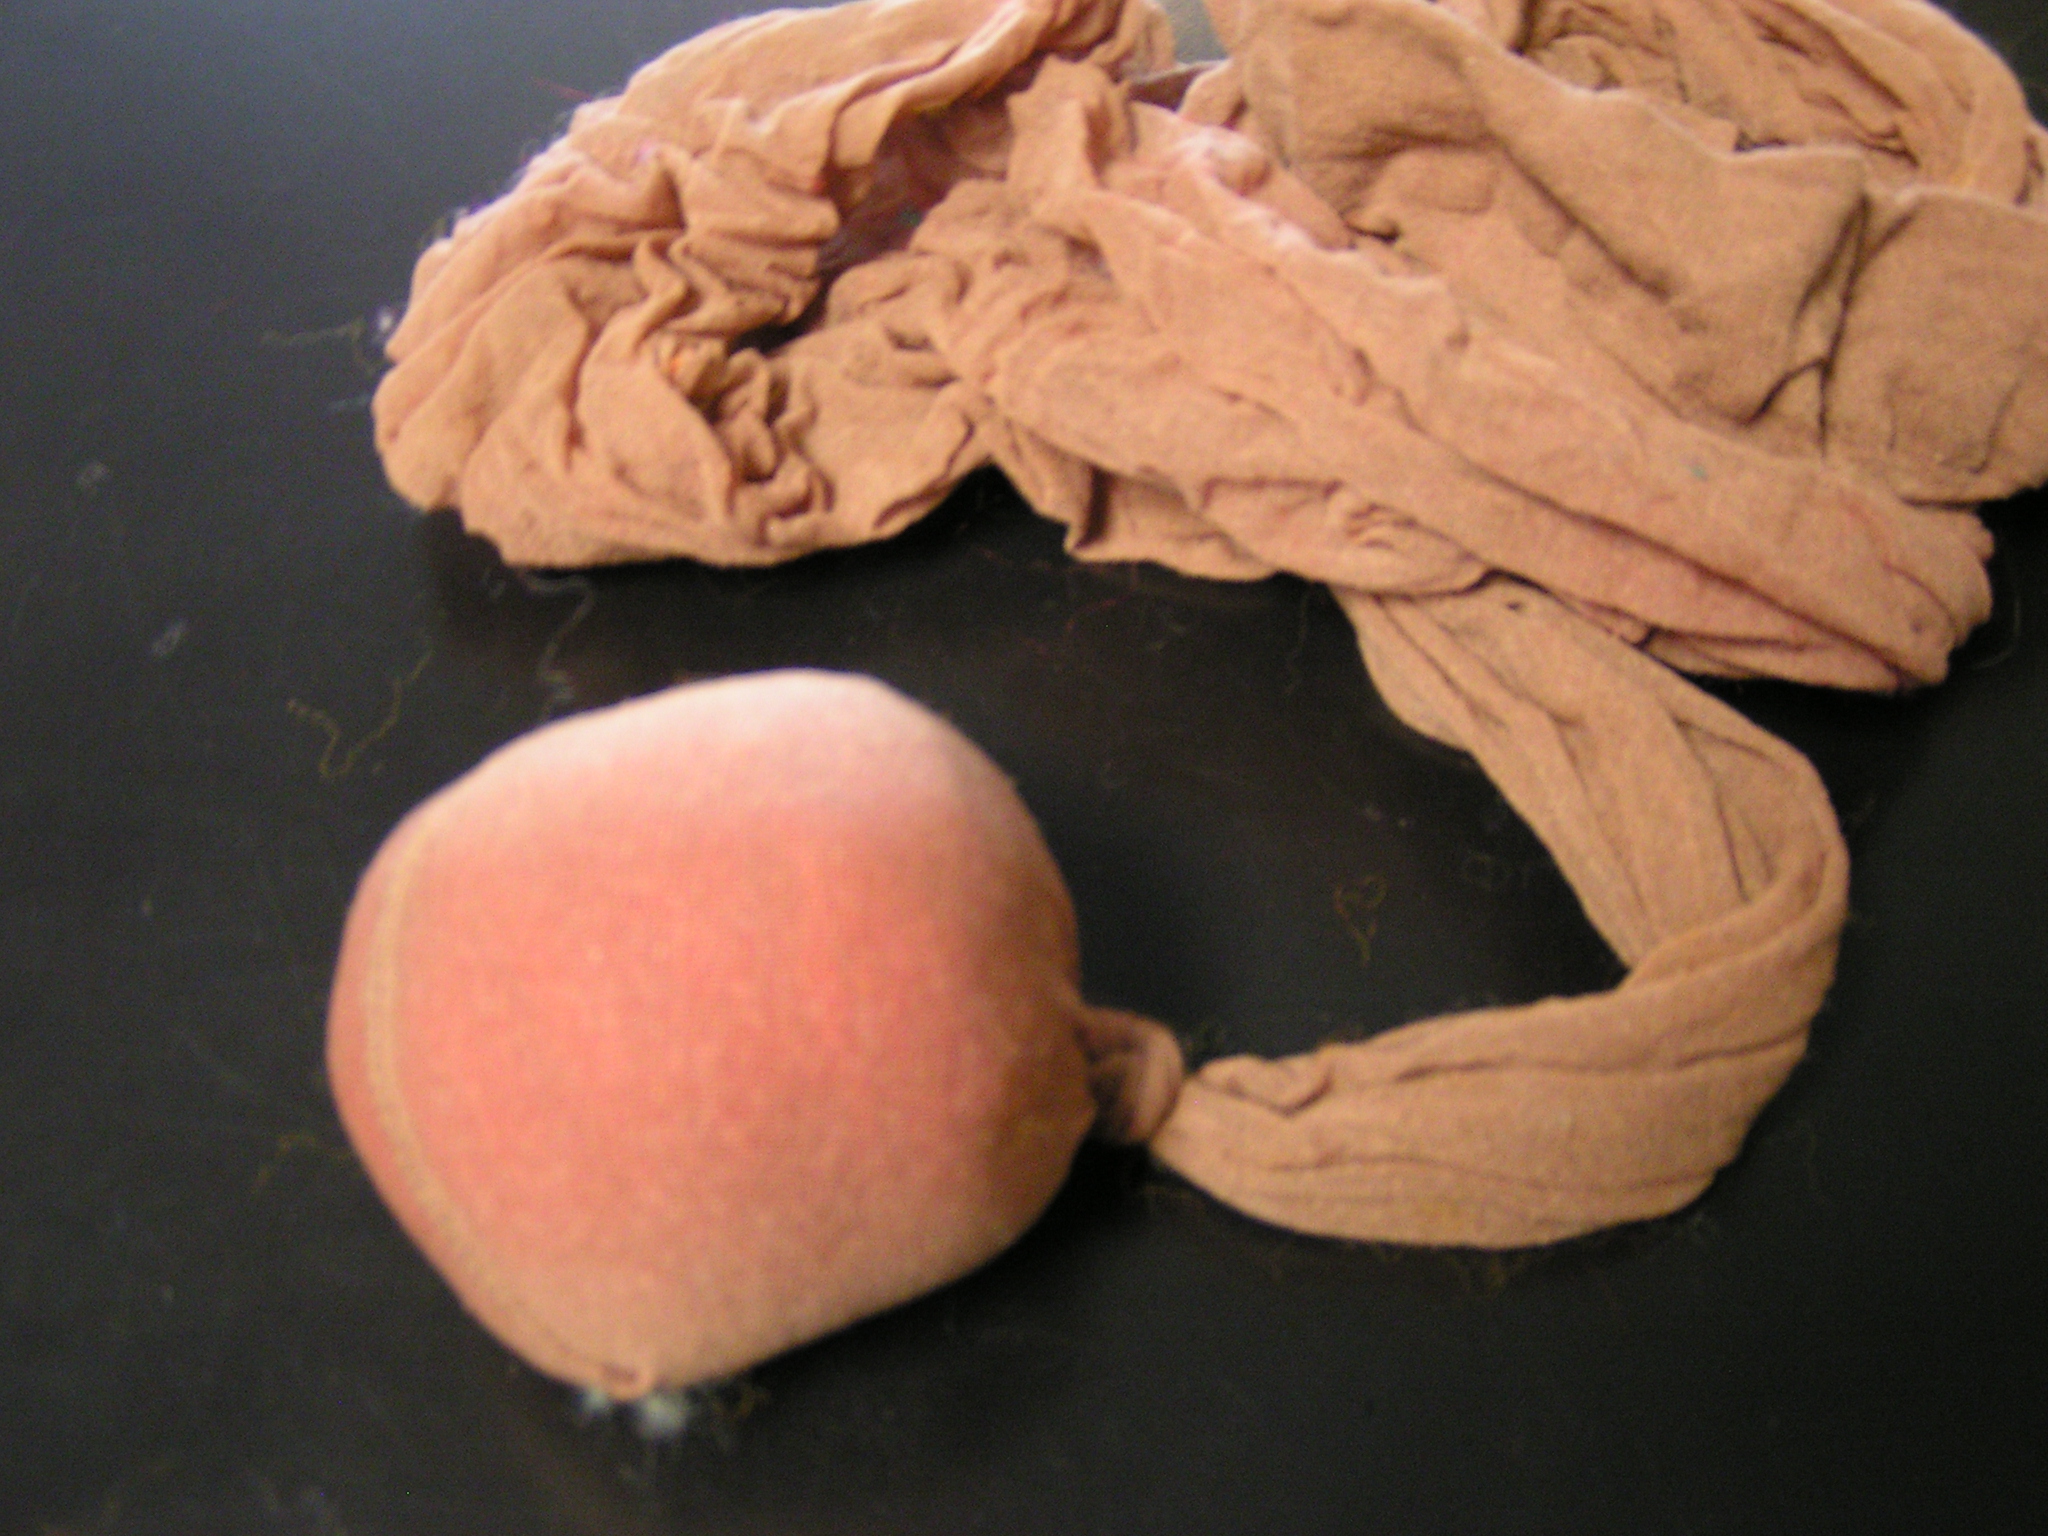
Then tie off the ball in the pantyhose with a loose knot. Do not pull the knot really tight or you’ll have difficulty getting the knots out later. Continue the steps above until you have filled the pantyhose legs with wool covered balls or until you have made as many as you need. I usually put 9 balls in each leg so that there are 18 in each pantyhose. This last set I made, I did a total of 6 dozen. Now I’m all ready for Christmas sales and lots of happy cats!
The next step is to throw the ball filled pantyhose into the washing machine. I usually just put them in with another load that I am already doing such as towels or jeans. I run them through the regular cycle with the same amount of soap I would normally use in the washing machine. If you are using wool that you aren’t sure whether the color will run, put them in with one of those sheets that absorbs extra dye or wash them separately.
Not Yet Needled
Once the wash cycle is completed, pull them out and hang them to dry. You can remove them from the pantyhose when they are wet but the knots are easier to take out when everything is dry.
after washing machine
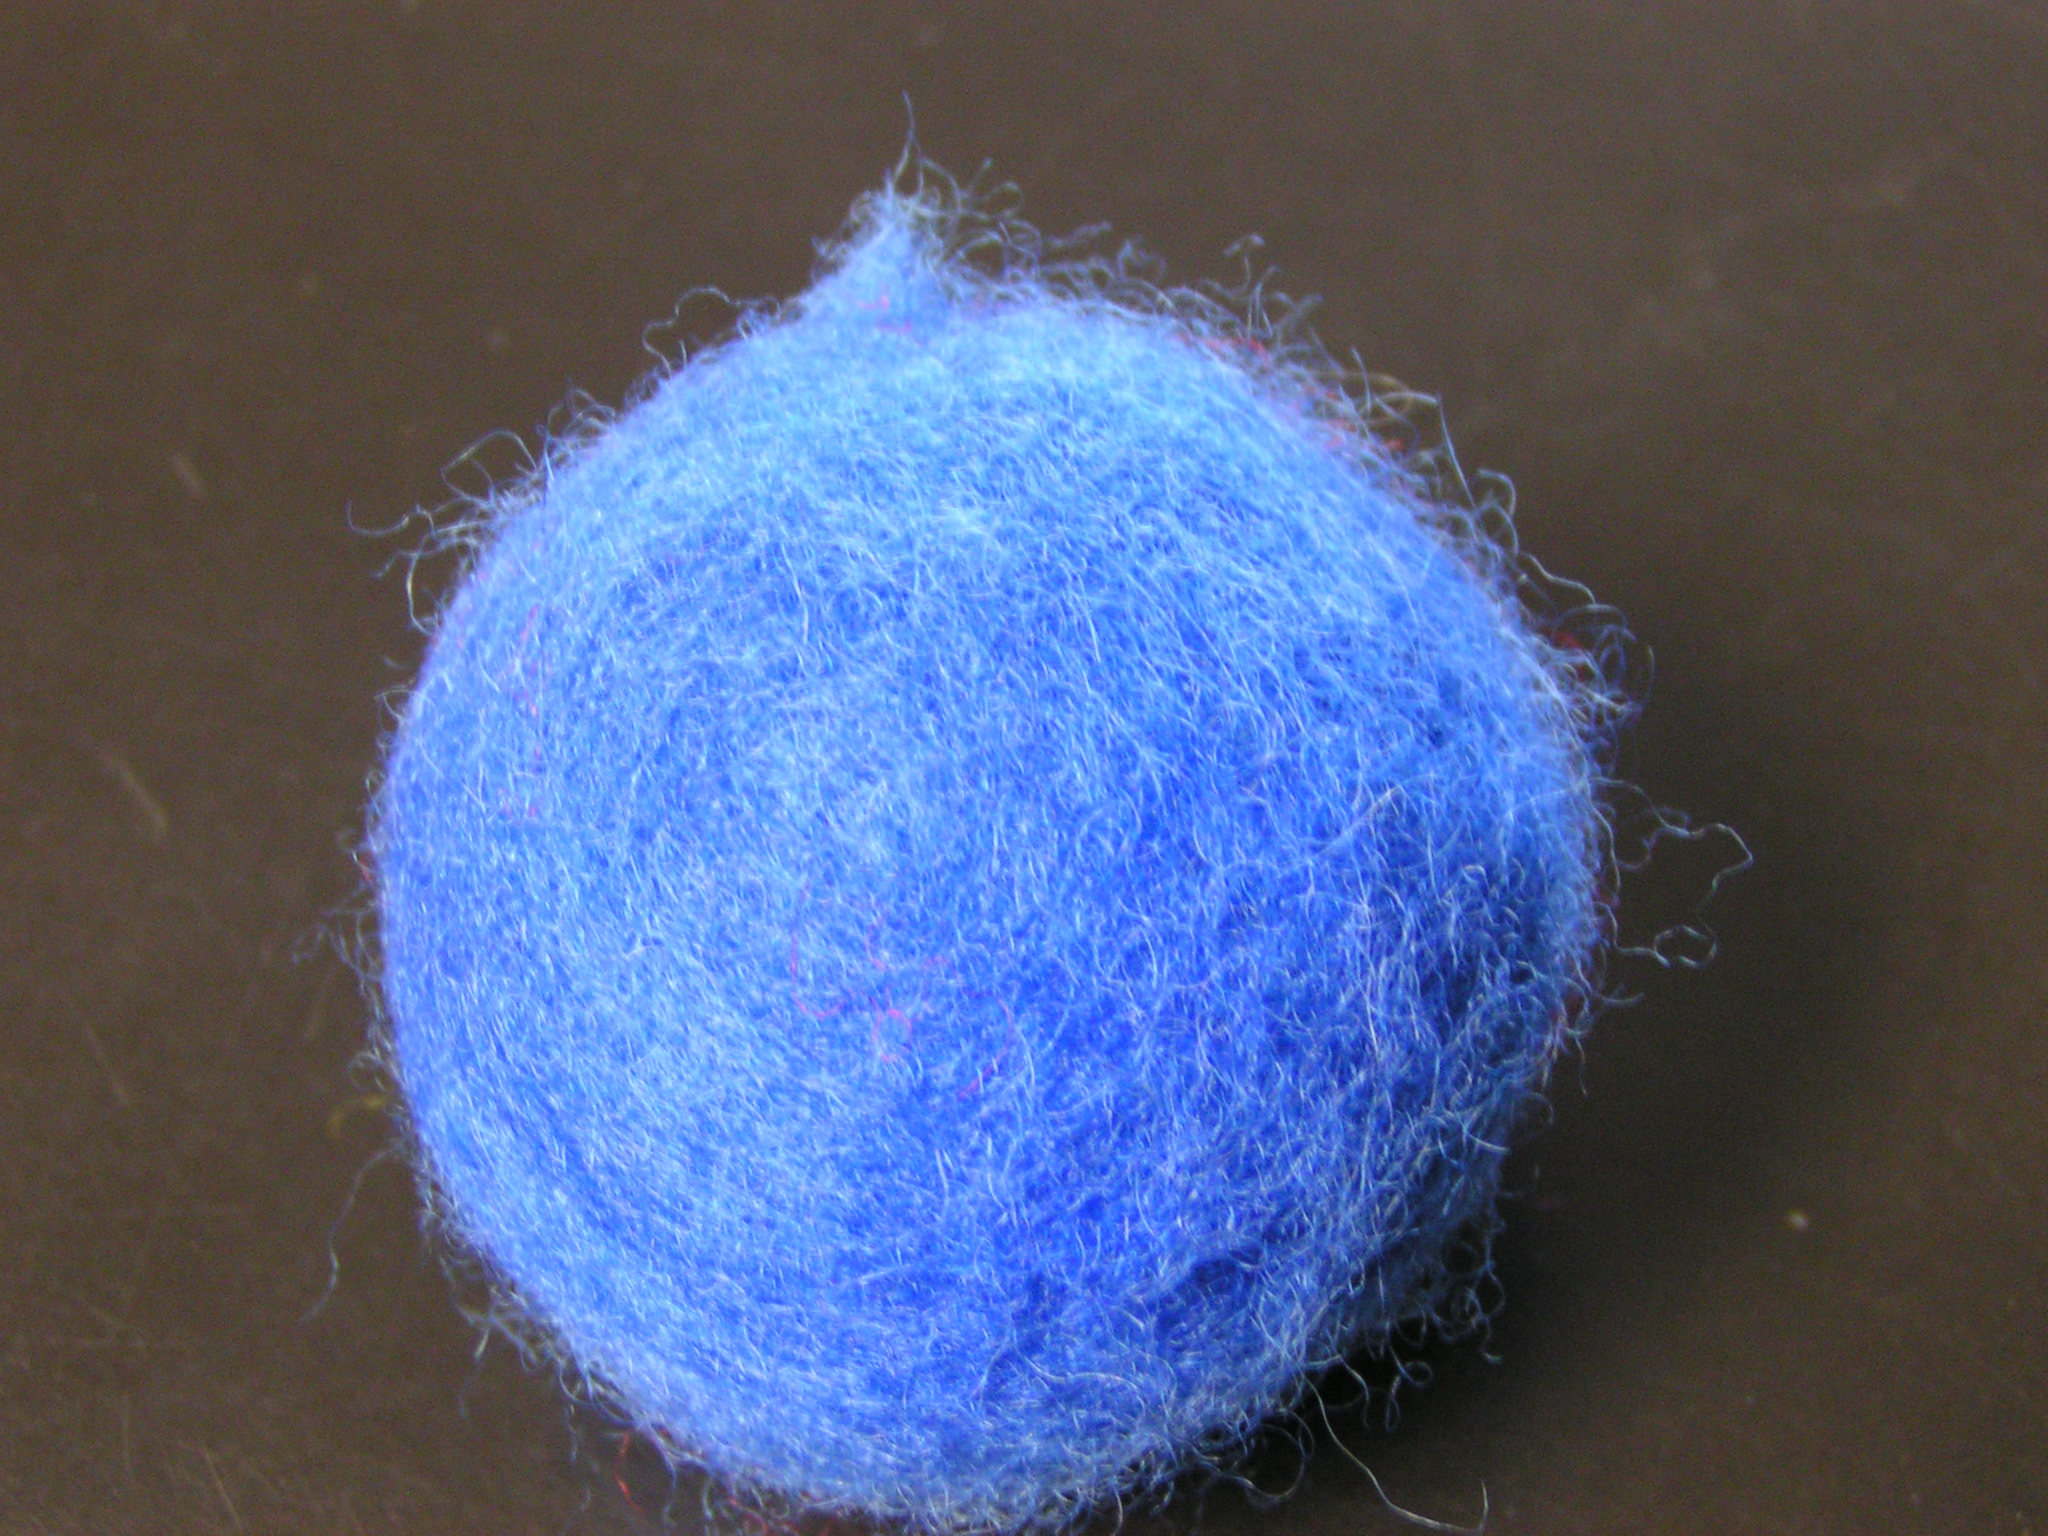
When they come out of the pantyhose, the cat toy still looks a little fuzzy and may have loose ends that got caught in the knot.
needling to finish
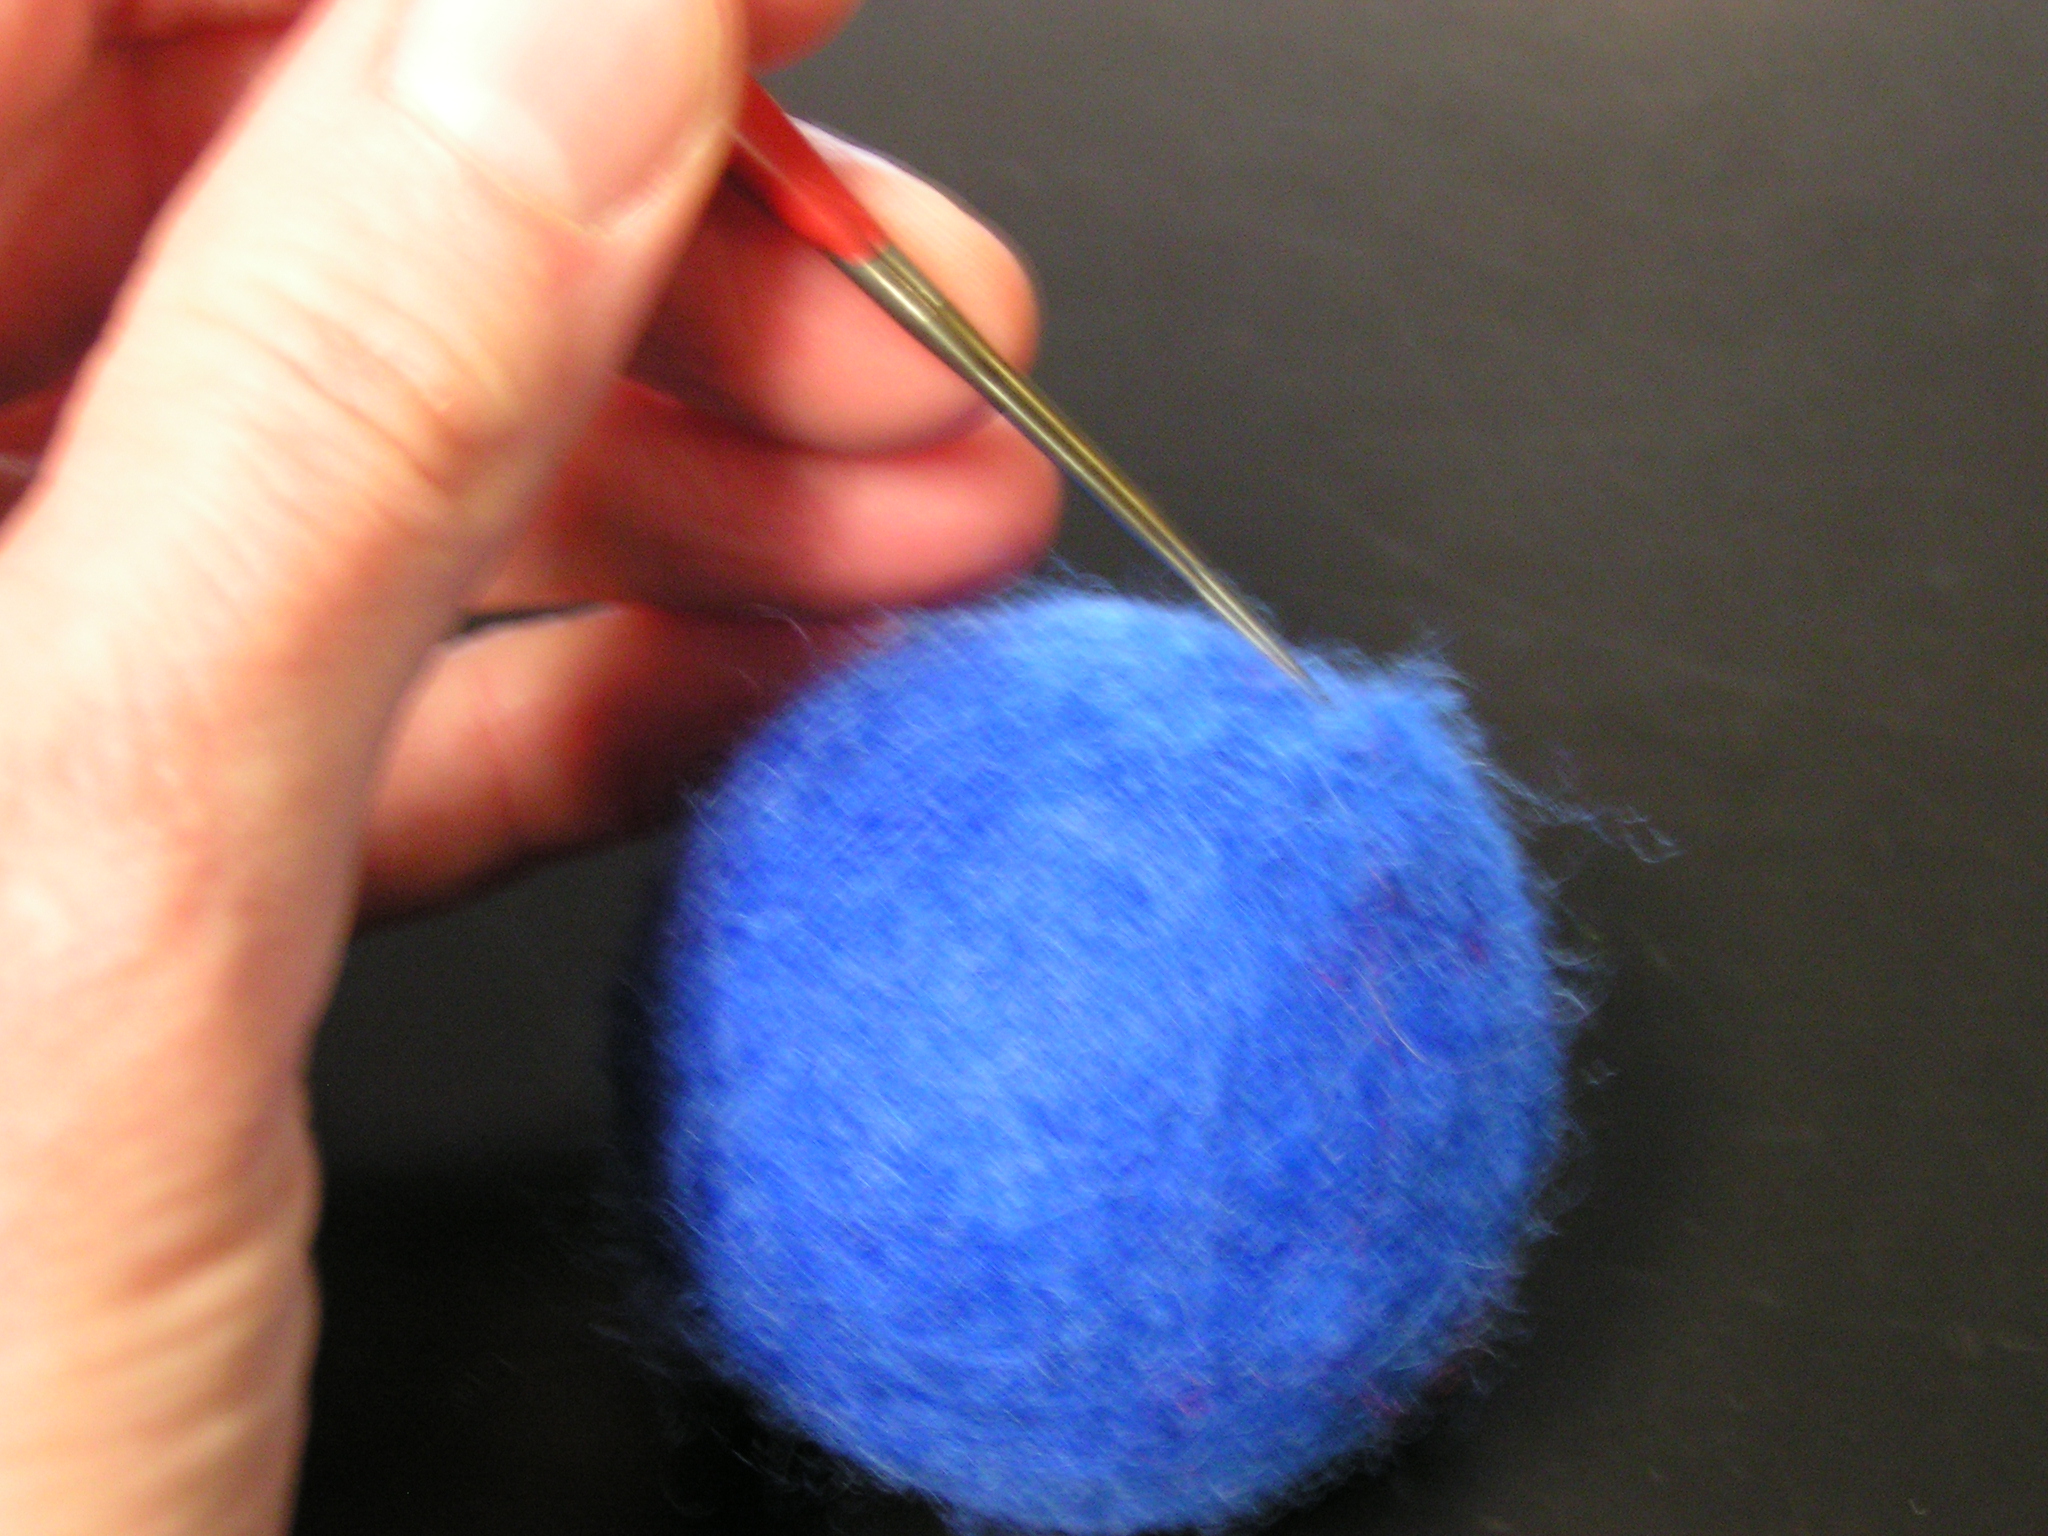
Use your felting needle to felt in any loose ends and to get rid of the “fuzzies”. Hold the needle at an almost parallel angle to the surface of the wool when you’re needling. Do not needle straight into the plastic golf ball or you may break a needle. Finished Cat Toys
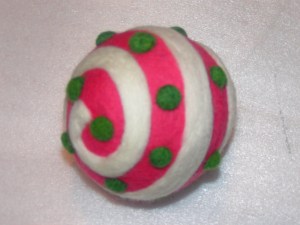
Here’s the bag of cat toys, about half of what I made. Obviously, you could put more decorations on these but I don’t think the extra effort is worth it. This idea can be used to make Christmas ornaments as well. Several years ago, I bought larger baseball sized whiffle balls and decorated them.
I added the swirls and “blobs” afterwards with a felting needle.
To hang these ornaments, I just threaded a large needle with matching yarn and made a loop of yarn at one end.
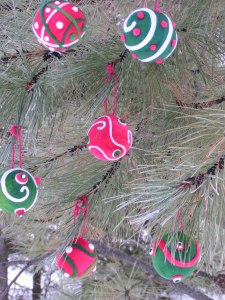
Here are the ornaments on the tree. I hope you enjoyed the tutorial and do let me know if you have any questions. I’d love to see your efforts if you try out the tutorial.

Felt Blooms – Guidelines

Felt Blooms – Guidelines

I really LOVE making flowers, especially out of felt. As I watch the material slowly blossom from between my own fingertips, my heart smiles a little bit. Honestly, there are MILLIONS (ok fine, more like 531,000) of tutorials for felt flowers out there. I think they are so popular because they can be sooo quick and easy. But personally, I think a blossom that takes a little more time, planning, and effort really makes a statement.
This post isn’t so much a step by step tutorial, but more the guidelines I follow when I make a felt flower. I pretty much make them in four stages: petal cutting, petal shaping, flower assembly, and finishing touches.
Stage 1: Cut the Petals
First, I pick a flower and do some “research”, which is my fancy word for doing a google image search for it. I’m basically looking for 2 things – the shape of the petals, and the fullness/density of the bloom. After this, I cut out seemingly millions of little squares in the colors I want (really, you probably only need 20 ish, depending on the flower). When I’m using different colors for a gradient effect, I try to size the petals differently to get larger as they go out. Finally, I meticulously cut each petal into the shape that I want. For this peony, I used about 20 petals, the smallest being about 4 cm wide, the largest being 6 cm wide.
STAGE 2: Shape the Petals
(clockwise) hot glue along the bottom edge, cup with thumb, backside, piles of petals!
Now, it’s time to make mounds of flat petals more lifelike! I take my hot glue gun, do a light line along the bottom edge (can you see it in the pic? :( ), and basically form the base of the petal into a “cup” using my thumb! REPEAT X 20
STAGE 3: Assemble the Flower
(clockwise) glue by edges, inner trio of petals, layers of petals!
Now is the fun part :) I take the smallest petals and try to figure out the best formation for the smallest, inner ring of petals. I’ll try 2, 3, 4, or 5 petals to see which looks best. After I figure it out, I glue the inner ring together by the edges. I then add petals one by one, layering out, gluing by the bottom of each petal (not the edges). For this peony, I ended up having about five layers of petals, going from cream, to very light pink, to a dusty light pink.
STAGE FOUR: Apply Finishing Touches
I like to add little embellishments, like leaves, or bits of lace, tulle, or netting. Different colors, textures, and some shine really ups the visual interest. I kept the embellishments light on this baby though, just sticking with a couple of leaves :)
By the end, there are a couple unsightly spots, namely the center of the flower, and the back of the flower. It’s easy to fill the center! I usually just glue or stitch in some pearls, beads, or buttons. Alternatively, you can make this furry felt roll up thing by taking a thin strip of felt, cutting notches (?) down its length, and then rollllling it up, using hot glue to secure :). For the back, I figure out what I want this flower to be (pin? headband? clip? belt?) and buy the necessary hardware (Michael’s, Joann’s, Walmart!). I cut a felt circle, just big enough to hide all the ugliness, and cut slits in it to slide a part of the hardware behind it. Can you see in the above pic how the top of the hair clip is covered by the felt, and actually directly glued onto the bloom? I then thoroughly hot glue the whole thing down!
And that’s it! Flower accomplished!
:) Have fun!

Felt Craft Projects: Mini Shamrock Banner

Felt Craft Projects:
Mini Shamrock Banner

If you like working with felt and want to do some felt craft projects for St. Patrick's Day, then give this banner a try! It's a cute little banner that's made up of different shamrock designs and simple embroidery stitches.
Decorating with this adorable banner is sure to bring the luck of the Irish to your home this St. Patrick’s Day! We have provided the complete instructions and template so you can easily create this banner yourself.
felt craft projects

Materials For Felt Craft Projects:
Mini Shamrock Banner

felt craft projects
What You Will Need:
  • Felt: Full sheet of olive green (9" x 12")
  • Green felt (4 or 5 shades)
  • Gold felt
  • Embroidery thread: gold, black, 4 – 5 shades of green
  • 6 green buttons (Size: 1/2" – 5/8" wide)
  • 2 large green buttons (Size: 3/4" – 1")
  • 6 green beads
  • Ribbon (15" long piece)
  • Pins and needle
  • Scissors 


    Instructions For Felt Craft Projects:
    Mini Shamrock Banner


    Step 1:

    Print and cut out the shamrock template for the banner. Trace and cut out the patterns with the following felt colors. Also the types of stitches used are listed by each photo:
    felt craft projects                                                                     
                                                                         

    Background - bright green felt, whip stitch in medium green thread.

    Shamrock - medium green felt, running stitch in light green thread. 

    felt craft projects                                                                     
                                                                         

    Background - dark green felt, whip stitch in light green thread.

    Shamrock - bright green felt, backstitch in medium green thread. 

    felt craft projects
    Background - medium green felt, whip stitch in light green thread.

    Letters - bright green felt, running stitch in medium green thread.

    Horseshoe - gold felt, running stitch in yellow/gold thread,French knots in black thread. 

    felt craft projects                                                                     
                                                                         

    Background - dark green felt, whip stitch in light green thread.

    Shamrock - olive green felt, backstitch in dark green thread. 

    felt craft projects                                                                     
                                                                         

    Background - bright green felt, whip stitch in medium green thread.

    Shamrock - dark green felt, running stitch in light green thread. 

    felt craft projects   
    Step 2:
    Now that you know what colors of felt and thread to use, cut out all the pieces from the patterns and then evenly space the 5 background felt pieces on the 9" x 12" olive green felt.

    Pin the 5 felt pieces into place so that the felt won't move as you are stitching them onto the banner. See photo F to see how this will look. Sew the pieces on using the whip stitch around the edge.

    Step 3:
    Now stitch the shamrocks, letters and horseshoe onto their appropriate background using the stitches listed above by each of their photos. Also see the photo at the bottom of this page as a guide.

    Step 4:

    On two of the shamrocks, outline them using the running stitch. You will then sew a button on each of the shamrock petals. See photos A and E.

    And on the other 2 shamrocks you will use the backstitch to outline the shamrock and to sew a swirl design in each petal. Then sew on a bead in the center of each swirl. See photos B and D.

    Step 5:

    Sew the letters on using the running stitch down the center of each letter. For the horseshoe, you will sew four French knots in black thread on each side of the horseshoe. Then in yellow thread, use the running stitch to finish sewing on the horseshoe. See photo C.

    Step 6:

    Using about 15” of ribbon, sew the ends to the top corners of your banner on the backside. Make sure your stitches are placed where they will later be hidden by the large buttons in the front. Now sew a large button in each top corner to cover the stitches from the ribbon.
    felt craft projects

    Step 7: Optional

    If your banner tends to bend forward while hanging on the wall, you could do this optional step.

    Cut about a 1" X 8" strip of cardboard and glue it to the back of the banner. See photo G. Only glue the two ends of the cardboard strip and be sure to place the glue right behind the two large green buttons. This way no glue will show from the front. You could use any type of glue you would like, but we would suggest using hot glue.


    Your Mini Shamrock Banner is now finished!

    felt craft projects

    For more felt craft projects or sewing craft ideas, click the link below and see our other fun and easy craft ideas.

четверг, 7 января 2016 г.

Комплект для зимы

Комплект для зимы

Комплект для зимы, фото

Материалы:

  • 400 г пряжи красного цвета (100% шерсть, 380 м/100 г),
  • круговые спицы № 3,
  • пуговицы в тон пряжи - 3 шт.
Лицевая гладь: лицевые ряды -лицевые петли, изнаночные ряды - изнаночные петли.
Изнаночная гладь: лицевые ряды - изнаночные петли, изнаночные ряды - лицевые петли.
Платочная вязка: лицевые и изнаночные ряды вязать изнаночными петлями.
Узор для манишки: вязать по схеме 1. На схеме указаны лицевые ряды, изнаночные ряды вязать по рисунку. В высоту повторять с 1-го по 4-й ряды.
Узор для шапочки: вязать по схеме 2. На схеме указаны лицевые ряды, изнаночные ряды вязать по рисунку. В высоту указаны все ряды.
Узор для варежки: вязать по схеме 3. На схеме указаны лицевые ряды, изнаночные ряды вязать по рисунку. В высоту повторять с 1 -го по 4-й ряды.

Описание вязания манишки

Набрать 122 п. и вязать 4 см платочной вязкой. Продолжить вязание, распределив петли следующим способом: кром., платочная вязка - 5 п., узор по схеме 1-110 п., платочная вязка - 5 п„ кром. На планке, с правой стороны вязания, для пуговиц на равном расстоянии друг от друга выполнить петельки.
На высоте 20 см от наборного ряда петли закрыть.
Комплект для зимы, фото 2

Описание вязания шапочки

Набрать 100 п. и вязать по схеме 2. На высоте 24 см от наборного ряда петли разделить на 6 условных частей. Для формирования донышка шапочки в каждом лицевом ряду убавить 6 раз по 1 п.
На высоте 36 см от наборного ряда петли закрыть.
Варежки: см. мастер-класс ниже.
Мастер-класс по вязанию варежек

Сборка

Пришить пуговицы. Выполнить задний шов шапочки.

Схемы и выкройка для вязания комплекта:

Схемы и выкройка для вязания комплекта

Вязание спицами "Варежки монохром"

                                                     Варежки монохр
ом