Felt Craft Projects:
Mini Shamrock Banner
If you like working with felt and want to do some felt craft projects for St. Patrick's Day, then give this banner a try! It's a cute little banner that's made up of different shamrock designs and simple embroidery stitches.
Decorating with this adorable banner is sure to bring the luck of the Irish to your home this St. Patrick’s Day! We have provided the complete instructions and template so you can easily create this banner yourself.
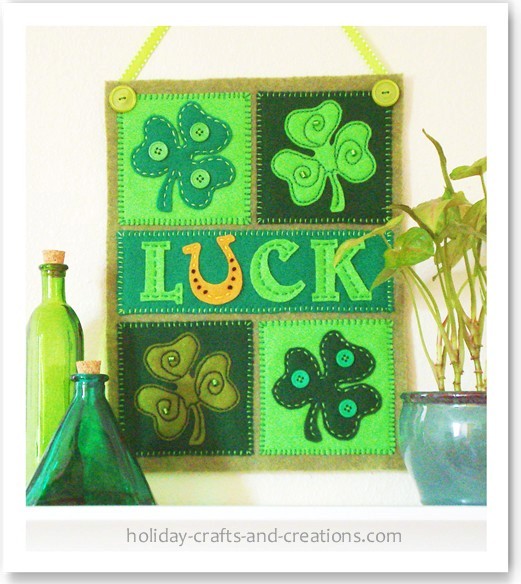
Materials For Felt Craft Projects:
Mini Shamrock Banner
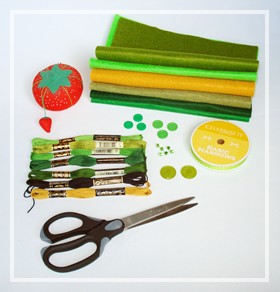
What You Will Need:
- Felt: Full sheet of olive green (9" x 12")
- Green felt (4 or 5 shades)
- Gold felt
- Embroidery thread: gold, black, 4 – 5 shades of green
- 6 green buttons (Size: 1/2" – 5/8" wide)
- 2 large green buttons (Size: 3/4" – 1")
- 6 green beads
- Ribbon (15" long piece)
- Pins and needle
- Scissors
Instructions For Felt Craft Projects:
Mini Shamrock Banner
Step 1:
Print and cut out the shamrock template for the banner. Trace and cut out the patterns with the following felt colors. Also the types of stitches used are listed by each photo:
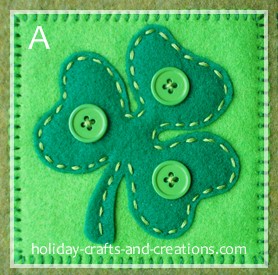
Background - bright green felt, whip stitch in medium green thread.
Shamrock - medium green felt, running stitch in light green thread.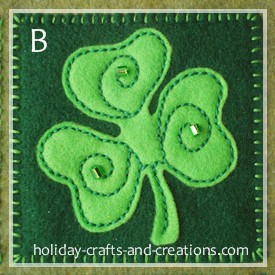
Background - dark green felt, whip stitch in light green thread.
Shamrock - bright green felt, backstitch in medium green thread.
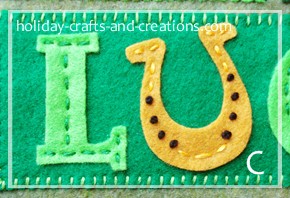
Background - medium green felt, whip stitch in light green thread.
Letters - bright green felt, running stitch in medium green thread.
Horseshoe - gold felt, running stitch in yellow/gold thread,French knots in black thread.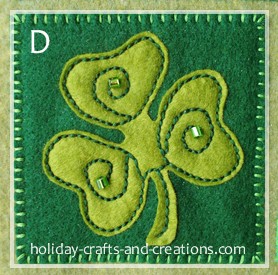
Background - dark green felt, whip stitch in light green thread.
Shamrock - olive green felt, backstitch in dark green thread.
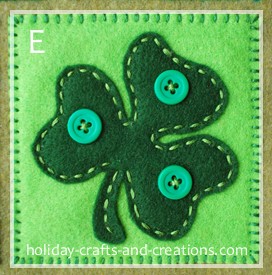
Background - bright green felt, whip stitch in medium green thread.
Shamrock - dark green felt, running stitch in light green thread.
Step 2:
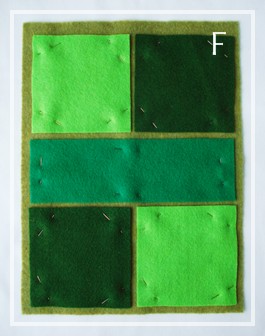
Now that you know what colors of felt and thread to use, cut out all the pieces from the patterns and then evenly space the 5 background felt pieces on the 9" x 12" olive green felt.
Pin the 5 felt pieces into place so that the felt won't move as you are stitching them onto the banner. See photo F to see how this will look. Sew the pieces on using the whip stitch around the edge.
Step 3:
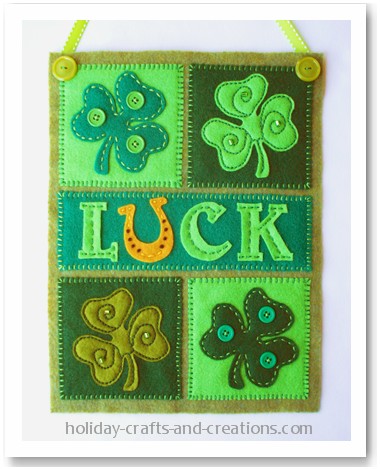
Now stitch the shamrocks, letters and horseshoe onto their appropriate background using the stitches listed above by each of their photos. Also see the photo at the bottom of this page as a guide.
Step 4:
On two of the shamrocks, outline them using the running stitch. You will then sew a button on each of the shamrock petals. See photos A and E.
And on the other 2 shamrocks you will use the backstitch to outline the shamrock and to sew a swirl design in each petal. Then sew on a bead in the center of each swirl. See photos B and D.
Step 5:
Sew the letters on using the running stitch down the center of each letter. For the horseshoe, you will sew four French knots in black thread on each side of the horseshoe. Then in yellow thread, use the running stitch to finish sewing on the horseshoe. See photo C.
Step 6:
Using about 15” of ribbon, sew the ends to the top corners of your banner on the backside. Make sure your stitches are placed where they will later be hidden by the large buttons in the front. Now sew a large button in each top corner to cover the stitches from the ribbon.
Step 7: Optional
If your banner tends to bend forward while hanging on the wall, you could do this optional step.
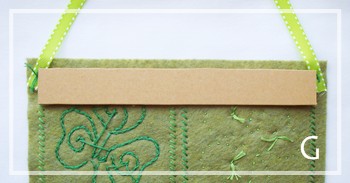
Cut about a 1" X 8" strip of cardboard and glue it to the back of the banner. See photo G. Only glue the two ends of the cardboard strip and be sure to place the glue right behind the two large green buttons. This way no glue will show from the front. You could use any type of glue you would like, but we would suggest using hot glue.
Your Mini Shamrock Banner is now finished!
For more felt craft projects or sewing craft ideas, click the link below and see our other fun and easy craft ideas.

Комментариев нет:
Отправить комментарий